Namely Payroll Processing
How to process regularly scheduled payrolls and manual payrolls in Namely.
OVERVIEW
Ready to process payroll? Learn how to process regularly scheduled payrolls and manual payrolls in Namely.
Refer to this video: Namely Payroll Processing
STARTING A PAY CYCLE
Payroll processing in Namely follows the same three steps whether you're running a regularly scheduled pay cycle or a manual pay cycle—the only differences are how the pay cycles are initiated and how you choose to configure your payroll in steps 1 and 2.
Refer to this video: Starting a pay cycle
Run a Regularly Scheduled Payroll
To start a regularly scheduled pay cycle:
-
Click the Payroll Center tab.
-
Click Run Payroll next to the pay cycle you want to start.
-
After the pay cycle has been initiated, the Run Payroll button changes to Continue.

Run a Manual Pay Cycle
Refer to this video: Run a Manual Pay Cycle
Manual pay cycles can be used for processing bonuses or commissions, or any other off-cycle payroll.
-
Manual pay cycles should not be used in place of a regularly scheduled pay cycle.
To start a manual pay cycle:
-
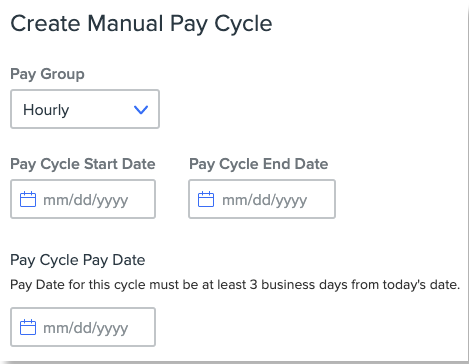
Click Create Manual Pay Cycle.

-
Select a Pay Group.
-
Enter a Pay Cycle Start Date.
-
Enter a Pay Cycle End Date.
-
Enter a Pay Cycle Pay Date.
-
You can’t select weekends, federal banking holidays, or any dates fewer than three days from the current date.
-
Click Create Pay Cycle. The new payroll cycle appears under Manual Payrolls in the payroll center.
-
Click Run Payroll next to the manual pay cycle you created.
-
After the payroll has been initiated, the Run Payroll button changes to Continue.
TIP:
Updates to employee information must be made prior to starting a pay cycle. Any changes to employee information made after initiating a pay cycle won't be included in that cycle. If you need to make changes to an employee's information after initiating a pay cycle, you can:
-
Click the Reset button next to the pay cycle in the Payroll Center to start it over. Any one-time changes you have made within the cycle will be lost.
-
Make the edits directly to the employee in Steps 1 and 2. Any edits made will only apply to this pay cycle.
-
Remove the impacted employee in Step 1 by clicking Delete and then re-add them to the pay cycle. The employee's data will update to reflect any changes you made.
STEP 1: HOURS AND WAGES
In step 1 of payroll processing, you can add and remove employees from your pay cycle, as well as add and edit wages and additional payments and checks.
All employees included in the pay cycle are listed in the step 1 employee table at the bottom of the screen. If an employee has multiple jobs, each job, along with its specific pay information, will be listed as a subrow below the employee’s primary check row.
Refer to this video: Hours and wages
Prorated Wages
Namely Payroll will automatically prorate wages for salaried employees who only work a partial workweek (for example, because they were hired or terminated) or who experience a wage change in the middle of a pay period (like a salary increase).
We recommend reviewing our Automated Salaried Proration article to learn more about how proration works, what types of employees it applies to, and how to turn the feature on or off.
Add and Remove Employees from a Pay Cycle
To add an employee to a pay cycle:
-
Click Add Employees.
-
You can add both active and terminated employees to a payroll.
-
-
Select the employee you want to add to the cycle.
-
You can add multiple employees at once.
-
-
Click Add.

To remove an employee from a payroll run, you can either:
-
Select the employee paycheck(s) you want to remove and click Remove Check(s).
-
If you have added a check for an employee, you’ll need to delete both checks to completely remove the employee from the pay cycle.
-
If an employee has multiple jobs, deleting the check will also remove all subrows associated with that employee.
-
If you're processing a manual or off-cycle payroll and don’t want to include all employees:
-
Click Select all.
-
Use the Search by employee name box to search for the employee(s) you want to include.
-
Deselect those employees.
-
Click Remove Checks to remove the employee checks you don't want to include.
Upload Employee Time Information
-
If you use Time Sheets in Namely, click the Sync, upload, and approve hours button and select Sync Approved Hours to automatically upload all employees' approved time information.
-
If you use Namely Time, see Syncing Hours From Namely Time to Payroll to learn how to automatically sync hours entered in Namely Time to your pay cycle.
-
If you use a third-party time-keeping solution, see How to Upload Hours into a Pay Cycle for more information on importing hours into payroll.
Zero All Wages
If you're processing a manual or off-cycle payroll, you can click Zero all wages to remove any default pay information.
-
The Zero all wages button in Step 1 won’t remove recurring additional payments. To remove all recurring additional payments, see Global Payroll Updates in Step 2.

Manually Edit Wages and Additional Payments
To manually enter wages and additional payments, click the pencil icon ! to expand an employee's check.
-
If an employee has multiple jobs, pay information will be separated by job.
-
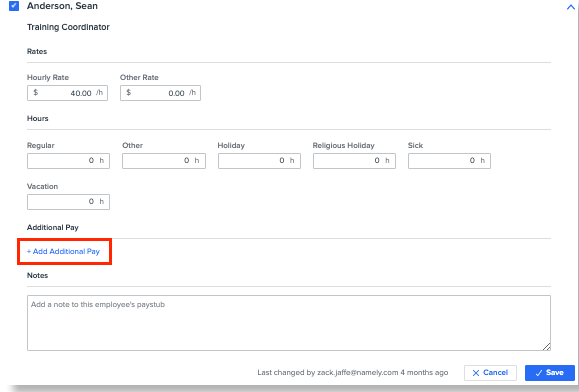
You can make adjustments to the Pay Period/Hourly Rates, Overtime, and Other rates in the provided fields.
-
The pay period/hourly rates defined on the employee’s compensation page will pre-populate in the Pay Period/Hourly Rates fields.
-
The Overtime field will only display if an employee is eligible to receive overtime pay.
-
-
Specific hour benefits can be entered in the Hours fields.
-
Up to three additional payments can be entered by clicking Add Additional Pay and selecting from the appropriate drop down menus.
-
If you need to make more than three additional payments, you can add an additional check for an employee.
-
-
If an employee has imported additional pay, it will display on this page.
-
You can remove imported additional pay by clicking Remove.
-
-
You can enter a message to display on the employee’s paystub in the Notes field.
-
This field also displays on the step 2 Edit Check page. Any notes you enter in step 1 will appear on the Edit Check page when you get to step 2. Likewise, if you make any changes to the field in step 2, it will replace what you wrote in step 1.
-
Imported additional payments can be uploaded in the Payroll Center drop down menu. For more information, visit our Uploading Additional Pay guide.
Add Check
If you need to add an additional check for an employee, click + icon to add a second check below the employee's current one.

-
If an employee has multiple jobs, pay information will be separated by job.
-
You can enter the Pay Period/Hourly Rates, Overtime, and Other rates in the provided fields.
-
Note: On the Add Check page, the Pay Period/Hourly Rate fields default to $0.
-
The Overtime field will only display if an employee is eligible to receive overtime pay.
-
-
You can add additional payments to the new check by clicking Add Additional Pay and selecting from the appropriate drop down menus.
-
You can enter a message to display on the employee’s paystub in the Notes field.
-
This field also displays on the step 2 Edit Check page. Any notes you enter in step 1 will appear on the Edit Check page when you get to step 2. Likewise, if you make any changes to the field in step 2, it will replace what you wrote in step 1.
-
All changes made within on the Add Check page only apply to the additional check. If the payroll is reset, the additional check is removed.
Advance to Step 2
After you've added or deleted any employees to your payroll, uploaded their time information, and made any edits to wages or hours, click Save and Continue.
-
Note: If an employee has no active wage or hours entered in Step 1, they will be automatically removed from the pay cycle and not be included in Step 2.
STEP 2: CHECKS AND ADJUSTMENTS
In Step 2 of payroll processing, you can:
-
Make global payroll updates to all of your employees' paychecks.
-
Make one-time edits to deductions, garnishments, and tax withholding information.
Any payroll adjustments made in Step 2 do not carry over into subsequent payroll cycles.
Refer to this video: Checks and adjustments
Make Global Payroll Updates for All Employees
To make one-time payroll updates that apply to all of your employees, click Global Payroll Update.

On the Global Payroll Update page, you can:
-
Zero all recurring additional pay for all employees.
-
Click Disable Direct Deposit to disable direct deposit for all employees.
-
Stop Namely check printing to print in-house. See In-House Check Printing for more information.
-
Adjust the tax frequency and federal withholding percentage for all employees.
-
Individual changes to an employee’s federal withholding will override any adjustments made on the Global Payroll Update page.
-
-
Suppress garnishments, deductions, and benefits accrual for all employees.
-
Suppressing benefits prevents manual debits and credits from posting on this payroll.
-
After you've made any desired changes, click Back.
Edit Garnishments, Deductions, and Withholding
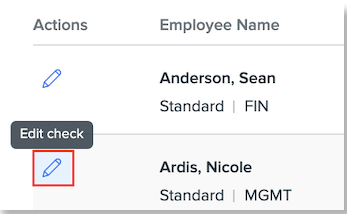
To make one-time updates to an employee’s garnishments, deductions, and withholding information, click the pencil icon next to their name to access the Edit Check page.
-
The wage information you entered/edited in step 1 displays in a read-only format.
-
If an employee has multiple jobs, pay information will be separated by job.
To update an employee's banking information or suppress their hour benefits from accruing for this pay period, use the Banks and Benefits section.
-
To override the employee’s direct deposit information and print their check in house, selectOverride for Printable Check
-
See In-House Check Printing for more information on overriding direct deposit.
-
-
To send the employee’s pay to a single account, select Send Money to One Account and select the appropriate account.
To suppress the employee’s hour benefits from accruing, select Suppress Hour Benefits Accruing on Check.

To change an employee’s deductionsfor this pay period, use the Deductions section. Here you can:
-
Suppress all deductions.
-
Suppress or update individual deductions.
 v
v
Not all deductions support negative amounts. If the deduction does not support negative entries, you’ll receive an error.
To change an employee’s garnishments for this pay period, use the Garnishments section. Here you can:
-
Suppress all garnishments.
-
Suppress or update individual garnishments.
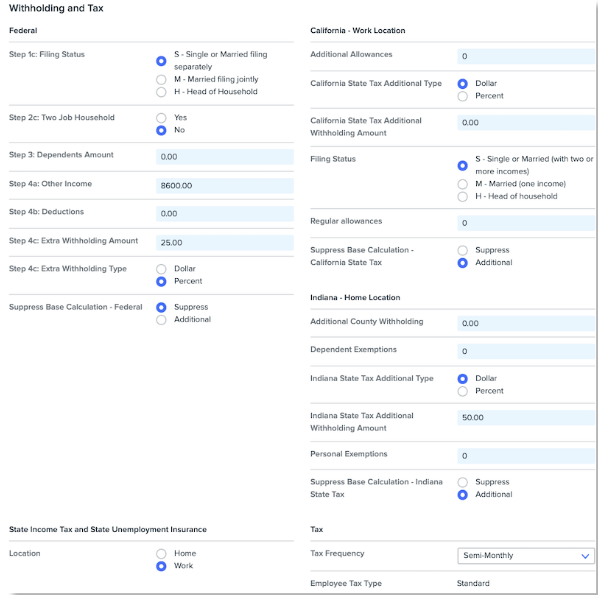
To update an employee's tax withholding information for this pay period only, use the Federal and State Withholding Sections. Here you can:
-
Select a Suppress Base Calculation.
-
Select Additional if you want to calculate based on the filing status and any additional withholding amounts entered.
-
Select Suppress if you want to ignore the filing status and only calculate based on any additional withholding amounts entered.
-
-
Update the Filing Status.
-
Add any Additional Withholding.
-
Any additional federal withholding will override any changes entered on the Global Payroll Update page.
-
-
Change the number of Total Allowances.
-
Select whether State Income Tax and Unemployment Insurance Tax apply to the work or home location.
-
Change the Tax Frequency.
After making any desired changes on the Edit Check page, click Save.
Advance to Step 3
After you have made any pay cycle adjustments, click Calculate Payroll.
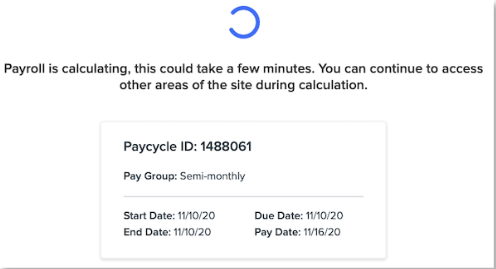
Your payroll may take a few minutes to calculate. After your payroll has finished calculating, the page automatically advances to Step 3.
-
You can leave Namely Payroll while your payroll is calculating, but your payroll is not finished until you have completed Step 3. If you leave, click Continue in the Payroll Center to return to Step 3.
STEP 3: REVIEWS AND APPROVALS
After your payroll has finished calculating, you can review it in more detail to ensure all information is accurate prior to approving and processing your payroll.
Refer to this video: Reviews and approvals
Review
To preview an individual employee's pay stub, click their name on the displayed employee list.

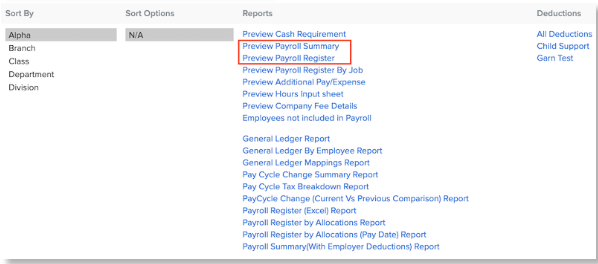
To review any automated payroll reports, click the title of the report under the Reports tab.
-
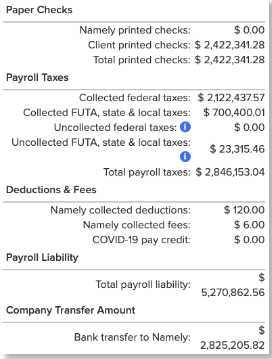
Open the Preview Payroll Summary to review the total wages, net pay, deductions, employee collected and uncollected taxes, employer collected taxes, and Namely printed checks (if applicable) for this payroll run.
-
Open the Preview Payroll Register to review wage, employee tax, employer tax, deductions, and net pay by employee.
If any errors are found, click Back and correct the appropriate information in Steps 1 and 2 of payroll processing.
If no errors are found, click Approve Pay Cycle to process your payroll.
Editing a Pending Payroll Cycle
You can make changes to pending payrolls you have approved before they are processed by the bank.
Refer to this video: Editing a Pending Payroll Cycle
To edit a pending pay cycle:
-
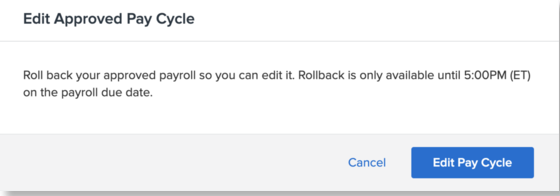
Click ! Edit Pay Cycle next to the pay cycle from the payroll center. A warning message will remind you to make any changes and re-submit your payroll by 5:00 PM ET on the specified due date for a successful payroll run.
-
You can also edit a pay cycle from the confirmation page after approving the pay cycle.
-
Click Yes, Edit Pay Cycle when prompted. You’ll return to step 1 of payroll processing.
-
After making any required changes in steps 1 and 2, re-calculate and approve your payroll again in step 3.
Any required changes must be completed and re-submitted before 5:00 PM ET on the specified due date or your pay cycle will not run as planned and funds will not be transferred.
ACH Limits and Wire Alerts
Daily ACH transfer limits are:
-
$100,000 direct deposited to a single employee, and/or,
-
$2,000,000 total, calculated from all payrolls you run in a single day. This total can be from one or across multiple pay groups.
If you use ACH for payroll and exceed either limit, you need to complete a one-time wire transfer to fund your payroll. The wire transfer must be completed by the displayed time and date or the payroll will not be funded.
-
If the transfer amount is less than $5,000,000, submit the transfer to First Premier Bank by 2:00 PM ET on the specified date.
If the transfer amount is greater than or equal to $5,000,000, submit the transfer to First Premier Bank by 12:00 PM ET on the specified date.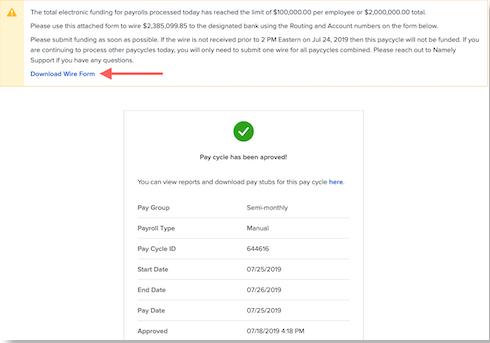
To download a form you can use to initiate a wire transfer with your bank, click Download Wire Form in the alert window.
You can return to this page and download the wire form by clicking Needs wire next to the pay cycle in the Payroll Center.
