Expense Reimbursements
Employees can now submit expense reimbursement requests for easy admin approval with just a few simple clicks.
OVERVIEW
We’ve streamlined expense reimbursement by integrating the submission and approval process with Namely HCM. Now employees can conveniently submit their expense details, and admins can manage the reimbursement process all the way from submission to final approval with just a few clicks.
If you do not see the Expense Reimbursement feature on an employee's profile, please submit a ticket to our service team.
HOW IT WORKS
Employees can manage expense details and locate past and current reimbursement submissions from the Expense Reimbursement tab in the left-hand navigation bar of the Payroll tab of their Namely profile.
Employee Submissions
To add new expense details, employees can click the Add Expense button.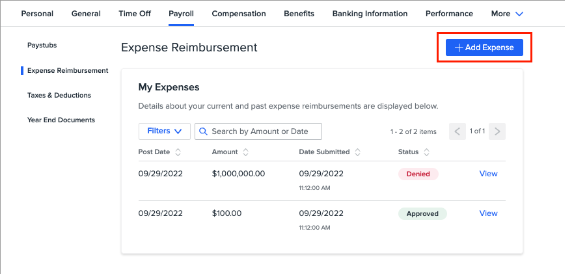
When entering expense details, the date of the expense submission automatically populates so that reimbursements correspond with the current pay cycle, and employees are required to enter an expense amount.
Other optional fields to include reference codes and notes, and to attach documentation are also available.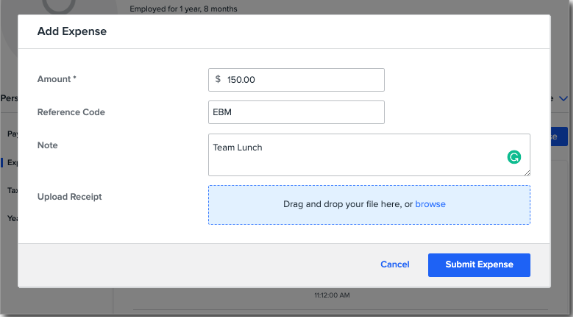
Once an expense has been submitted, it will appear in the employee’s Expense Reimbursement tab as Pending until an administrator takes action.
Once an administrator has taken action, the expense will appear as Approved or Denied.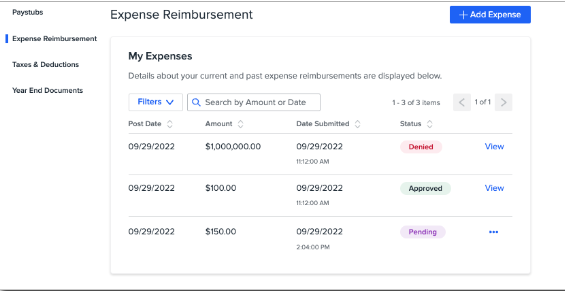
To view more details, make changes, or delete Pending submitted expenses, employees can click the three-dot menu to the right of the expense. 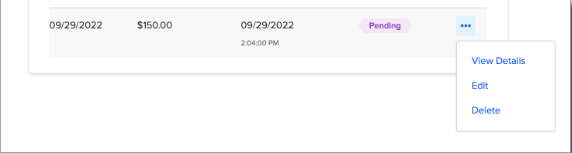
A warning message will appear upon clicking delete to help prevent accidental deletion.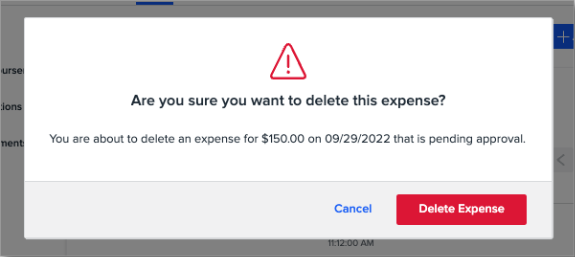
Note that employees are only able to delete or make changes to Pending submitted expenses. Once expenses have been approved or denied by an administrator, only the View option is available.
Employees are also able to search and filter expense submissions by date, status, and amount.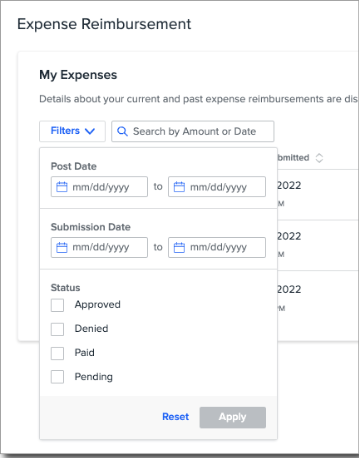
Administrator Approvals
Admins can quickly view, edit, approve, and deny expense reimbursement requests from within the Payroll Center by selecting the Approve Additional Pay/Expense option from the dropdown menu.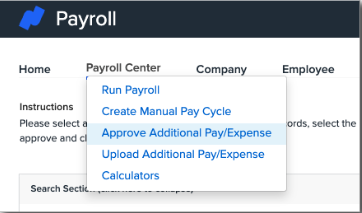
Expenses Reimbursements now live under their own tab to the right of Uploaded Pays.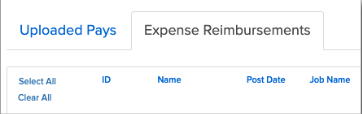
From this tab, administrators can view all expense reimbursement submissions—including those uploaded by employees and those entered by admins.
Here, admins can approve, delete, or deny expenses individually and in bulk. To manage in bulk, click the checkbox to the left of all submissions to be included in the desired action, and then click the Approve Selected, Delete Selected, or Deny Selected buttons in the upper right. 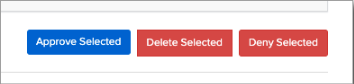
Note that the options for administrators to Edit and Delete are always available for expense records submitted by admins. However, admins are not able to Edit employee entered expenses. Therefore, the only action that administrators can take on employee-submitted expense records is to Approve or Deny—editing is only an option for admin-imported records.
If an admin denies an expense record, they will be prompted to fill out a custom Reason field explaining why the expense was denied. If multiple records are selected to Deny, the text entered into the Reason field will apply to all selected expense records.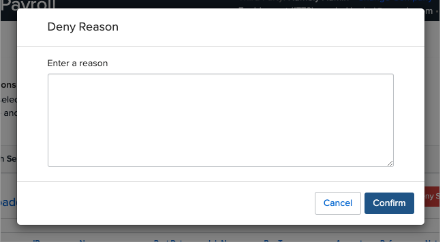
Also, note that the View option is only available to admins when employees have attached documentation to expense records they’ve submitted.
Again, once an admin has taken action on an expense record, no further changes are available to be made by the employee.
Disabling
You can request to disable this feature on your Namely site by submitting a ticket under HRIS > HRIS Settings > Company Settings > General Questions.