Utilizing the Messaging Center in Namely Time
This article explains how to send time-related messages using the Messaging Center in Namely Time.
OVERVIEW
Send messages to individual employees or the entire company in Namely Time through the Messaging Center! Utilize this function to send reminders and messages via email and SMS text messages. Configure the duration of these messages to allow the employees to receive them when they are performing their Namely Time clock operations.
SENDING A COMPANY-WIDE BULLETIN
-
In Namely Time, click the
 icon in the top right corner to open the Messaging Center.
-
Click the
 icon in the bottom left to compose a message.
-
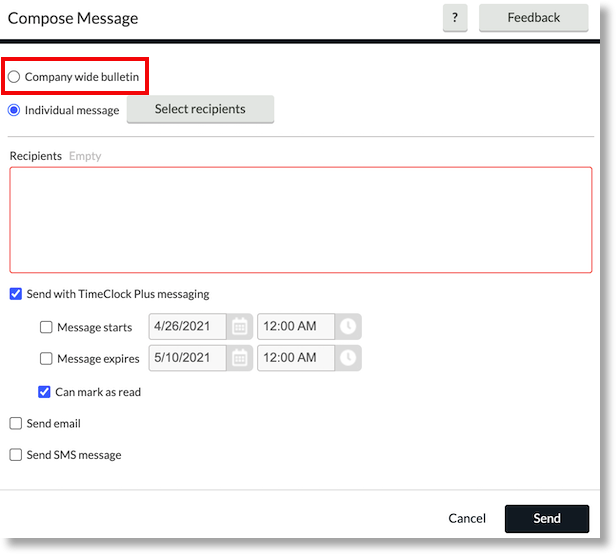
Select the Company wide bulletin option and type out the message in the blank text box.
-
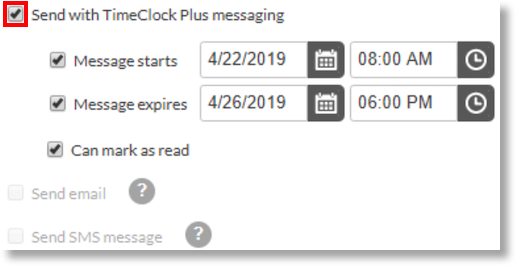
The checkbox labeled Send with TimeClock Plus messaging is auto-selected.
-
This option allows you to send the message through the TimeClock Plus internal messaging system.
-
-
If applicable, select the appropriate checkboxes:
-
Message starts: Message will display on the specified timeframe. If selected, enter a date and time for the message to start displaying.
-
Message expires: Message will expire on the specified timeframe. If selected, enter a date and time for the message to stop displaying.
-
Can mark as read: Allow employees to mark the message as read. This prevents the message from automatically displaying.
-
-
The message can also be sent out by selecting:
-
Send email: Send the message to employees via email. Employee mail settings must be configured.
-
Send SMS message: Send the message to employees via SMS text message.
-
-
Click Send to send the message to employees company-wide.
SENDING AN INDIVIDUAL MESSAGE
-
In Namely Time, click the
icon in the top right corner to open the Messaging Center.
-
Click the
icon in the bottom left to compose a message.
-
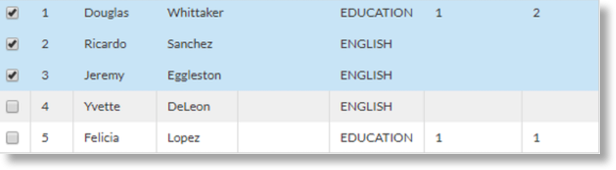
Select the Select recipients option and choose the appropriate recipients by using a filter or manually select the adjacent checkboxes.
-
Click Select recipients and type out the message in the blank text box.
-
The checkbox labeled Send with TimeClock Plus messaging is auto-selected.
-
This option allows you to send the message through the TimeClock Plus internal messaging system.
-
-
If applicable, select the appropriate checkboxes:
-
Message starts: Message will display on the specified timeframe. If selected, enter a date and time for the message to start displaying.
-
Message expires: Message will expire on the specified timeframe. If selected, enter a date and time for the message to stop displaying.
-
Can mark as read: Allow employees to mark the message as read. This prevents the message from automatically displaying.
-
-
The message can also be sent out by selecting:
-
Send email: Send the message to employees via email. Employee mail settings must be configured.
-
Send SMS message: Send the message to employees via SMS text message.
-
Messages can be sent out as both an email and SMS.
-
-
Click Send to send the message to selected employees.