Geofence Groups in Namely Time
This article includes instructions on how to create, configure, and assign Geofence groups in Namely Time.
OVERVIEW
The use of GPS or RFID technology creates a virtual geographic boundary that enables the software to trigger a response when a mobile device enters or leaves a particular area.
Learn how to create, configure, and assign Geofence groups in Namely Time in order to prevent employees from clocking in and out from their mobile device outside of a designated location.
SETTING UP A GEOFENCE
-
Go to Configure > Geofencing > Geofences.
-
Click the
 (Add) icon.
-
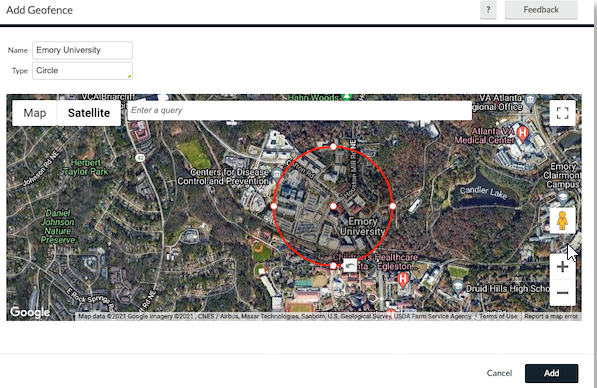
An Add Geofence window will appear. Type in the Name and Type for the geofence.
-
Set the geofence location.
-
Zoom in and out of the Google Maps™ viewer map and drag it around to find your desired location.
-
Click the location to set the center of the geofence.
-
TIP:
If the geofence you are creating is centered at your current location, certain browsers may allow you to share your location to set up the geofence.
-
Define the parameters of your geofence.
-
If you're using the circle geofence tool, expand and contract the diameter of the geofence by dragging the circular handles of the edge of the circle.
-
-
Click the
 (Add) icon to add the geofence to the list.
-
Once you have created and defined a Geofence location, your screen should look similar to the below.
SETTING UP A GEOFENCE GROUP
-
Go to Configure > Geofencing > Geofence Groups > Add.
-
An Add Geofence Group window will appear.
-
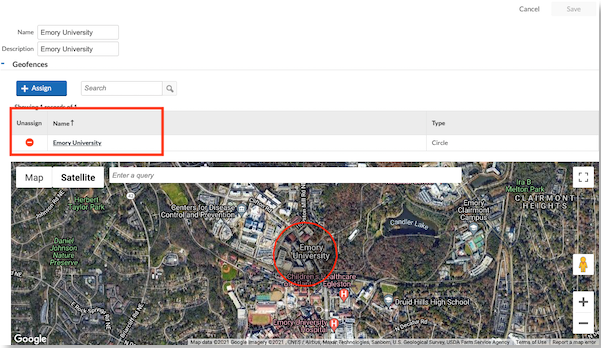
Enter a Name and add a general description for the group > Add.
-
Expand the Geofences section >
 (+ Assign) icon.
-
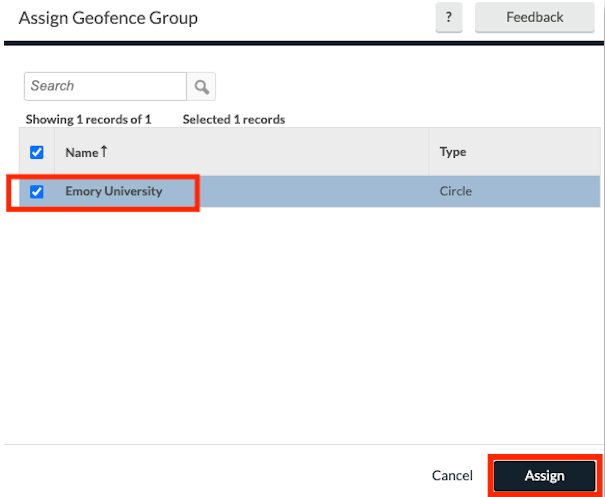
Select the applicable Geofences from the list.
-
Click Assign to add the geofences to the group > Save.
-
Once you have configured a Geofence Group with the assigned Geofence Location, your screen should look similar to the below.
ASSIGNING GEOFENCE GROUPS
Once you have established your Geofence Groups, assign them to job codes in Namely Time!
-
Go to Configuration > Job Codes.
-
Select the applicable job code from the list.
-
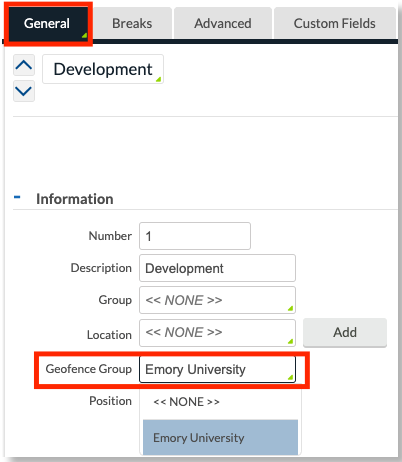
In the Information section, select the Geofence Group you wish to assign to the job code.
-
Click Save.
Note: These settings can be overridden on the employee job code level. If any of these job codes were added to employee profiles prior to the changes on the master job code list, the employees' job code settings will need to be updated to reflect the new setting since this change is not retroactive. These changes can be made in Employee > Employee Roles or Employee > Global Modification.
ASSIGN ON THE EMPLOYEE ROLE OR EMPLOYEE PROFILE
This section will advise you on how to assign a Geofence to the Employee Role for groups of employees, or on the Employee Profile for a single employee.
-
Select the applicable Employee Profile or Employee Role
-
Click Exceptions.
-
Expand the Shift section.
-
Place a checkmark next to restrict on clock operation. This will prohibit the employee from clocking in/ and out unless within the geofence.
-
Click Save.
TIPS
-
To view a geofence in the group:
-
Click on the geofence's name in the geofences list or use the Search bar above the list to find the specific geofences.
-
-
To edit Geofences:
-
Select the name on the list to update the settings.
-
-
To delete Geofences:
-
Click the gray Delete button.
-
-
To remove a geofence from the group:
-
Click the
 Red Circle Icon next to the geofence in the geofences list.
-
-
To delete a geofence group:
-
Select the applicable group from the list > Delete.

-