Setting Up Your Integration with Lever
Instructions on how to set up a Namely integration with Lever.
Overview
As an official Namely partner, Lever makes it easy to automatically push hired candidate information from Lever into Namely, streamlining the recruiting to HR process and, hence, saving time and improving data entry quality. Hired candidate data from Lever can be configured to push into Namely Onboarding or HRIS.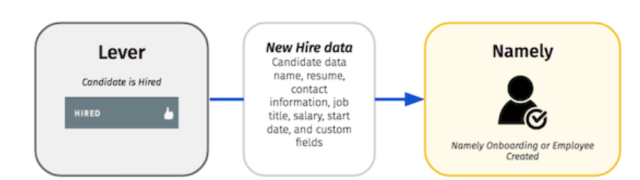
Setup
Please note: To enable this integration, you’ll need to be a Super Admin of your Lever account and an Administrator of your Namely account. If the Namely personal access token is generated by a user other than an Administrator, you may not see all candidate details from Lever pre-populated in your Namely instance.
Fields
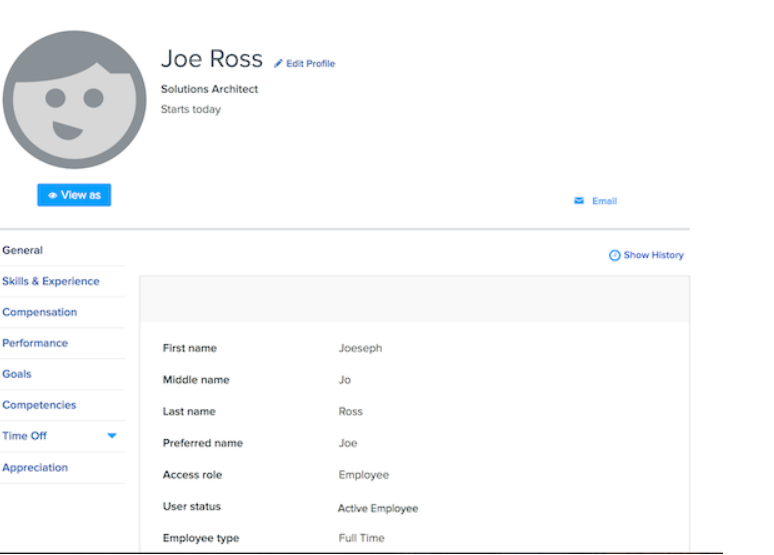
|
First name |
Middle name |
Last name |
|
Preferred name |
Mobile phone |
Home phone |
|
Personal email |
|
LinkedIn URL |
|
Job title |
Employee type |
Start date |
|
Salary Currency Type* |
Salary Amount* |
Salary Start Date* |
|
Resume |
|
|
*At this time, Namely only accepts salary information for employees with annually defined salaries. This means that hourly employees, for example, will not have their salary information populated into their corresponding Namely profile.
Enabling the Namely Integration in Lever
First, navigate to your account's Integrations page in Settings. 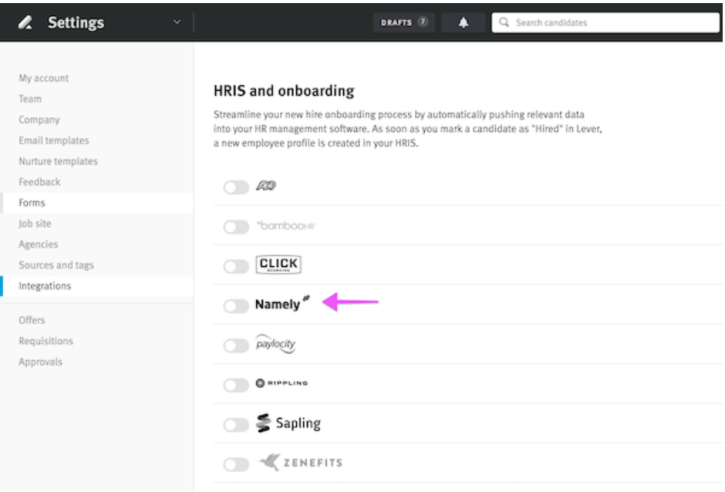
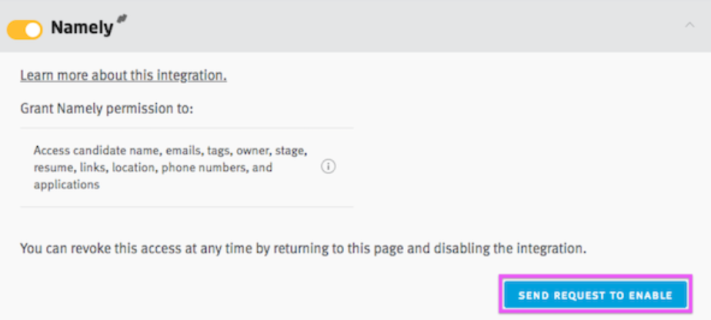
When you toggle on the Namely integration, please read through the accompanying integration details, then click the button "Send request to enable" which will notify Lever Technical Support of your request.
Lever will reach out to you requesting the following required information:
-
Namely Company URL - Be sure this is an EXACT match with the spelling you use for your Namely account (e.g. https://:COMPANY.namely.com/)
-
Namely Personal Access Token - This key can be generated from your Namely dashboard (Details below)
-
Desired Namely Record Type - You have the opportunity to choose whether to create a new Namely HRIS record, or create a new Namely Onboarding record when candidates are hired in Lever.
Configuring Namely
Creating a Personal Access Token
TIP
We recommend that you create a non-user account in your Namely instance with full Admin access to create the API key (such as integration@yourcompany.com). This will assure that the integration continues to operate successfully in the event that your admin users depart or have access role changes. This can be configured within the Namely's Personal Access Tokens menu.
To generate a personal access token, follow the steps below:
-
Login to Namely as the user account that you wish to use for the key creation
-
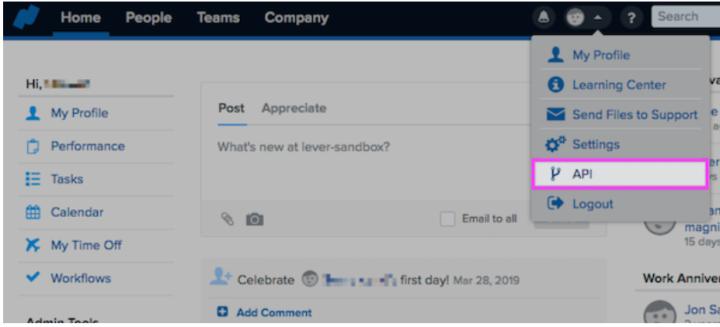
Click on your profile image in the top right corner of the window and select API.
-
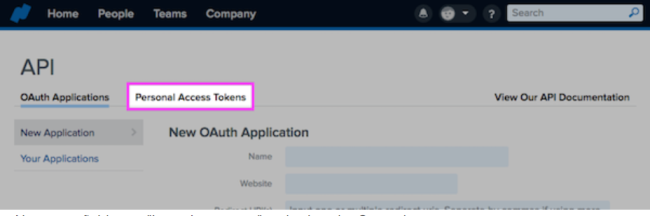
Select the Personal Access Tokens tab in the API menu.
-
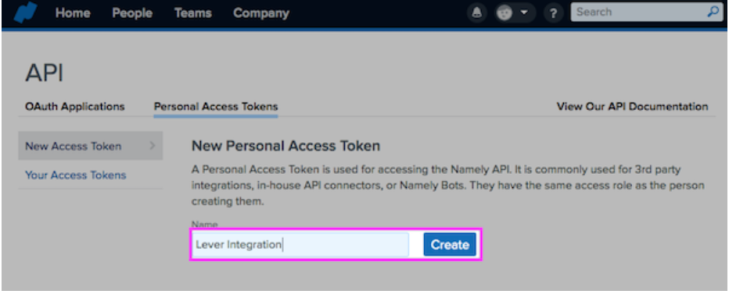
In the Name text field, type "Lever Integration" and select the Create button.
Once complete, Namely will generate a personal access token which you should copy and store in a document you can easily access. You will provide this token to Lever as part of your configuration.
Field Mapping
The Namely integration pulls candidate details from a variety of locations in Lever. Take some time to read through the following Lever article which describes how the offer and profile forms can be configured to specify which data is sent to Namely.
Creating a new Namely record from Lever
Once the integration has been configured, you can begin sending new hire candidate data from Lever to Namely. The integration will create either an Onboarding record or a new HRIS record in Namely, depending on which you've selected for your integration.
Candidate Preparation
Before hiring the candidate, make sure that all desired fields are filled out on the candidate, requisition, offer and "Namely Form" profile form. The more fields present and populated in Lever, the more fields that will be pre-populated in Namely. 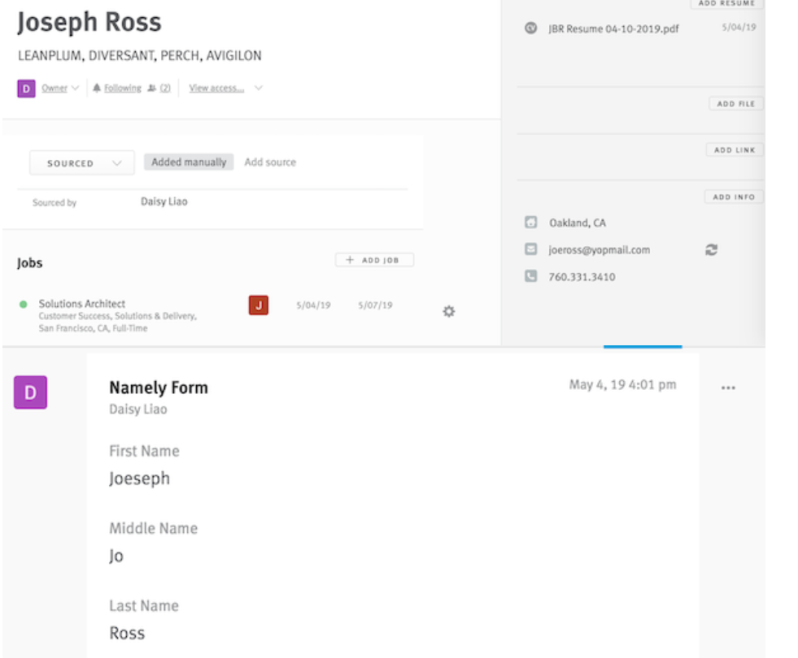
Hiring a Candidate
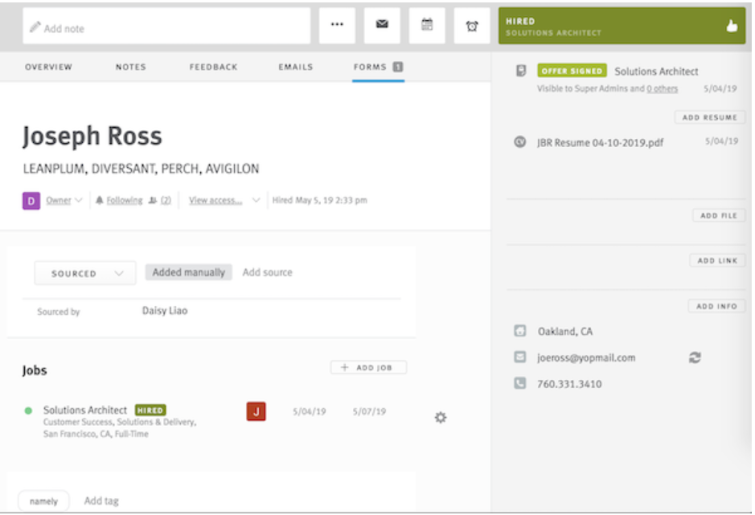
Once the candidate details have been filled out, you may then archive the candidate as "Hired" in Lever.
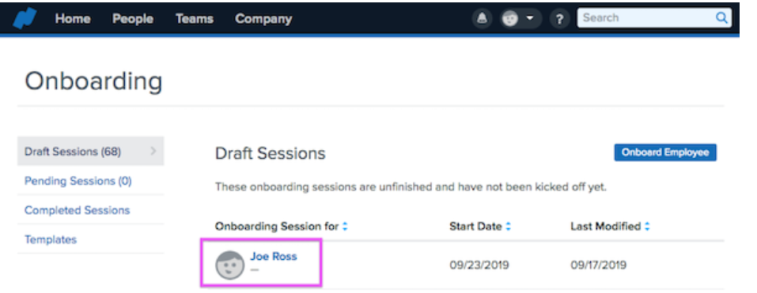
If you have elected to configure the Namely integration for Onboarding, a draft onboarding session will automatically be created in Namely within a few minutes. At a minimum, First Name, Last Name and Email are required to create a record in Namely.
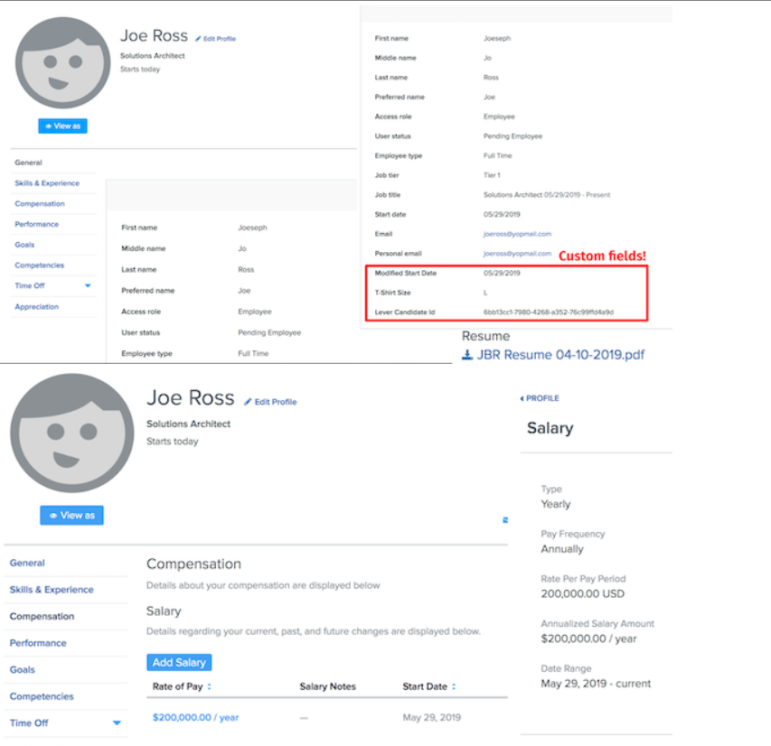
Notice that many profile fields and salary information are pre-populated in Namely. For more information on how fields are mapped, please see this Lever article.
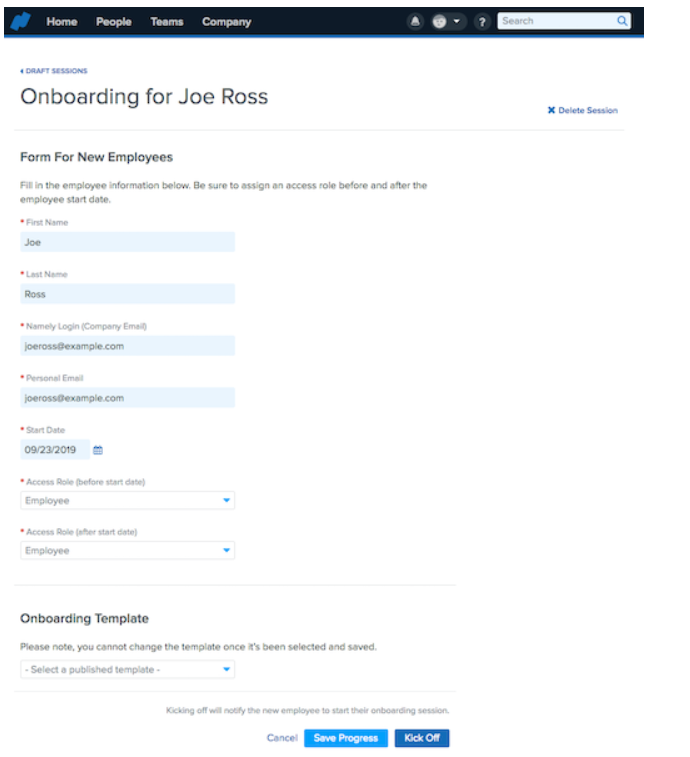
From here your team may click on the candidate to continue finalizing the candidate details. Once complete, click the Kick Off button to finish.
If you have elected to configure the Namely integration for HRIS, the candidate will be created as a new employee directly in Namely HRIS.
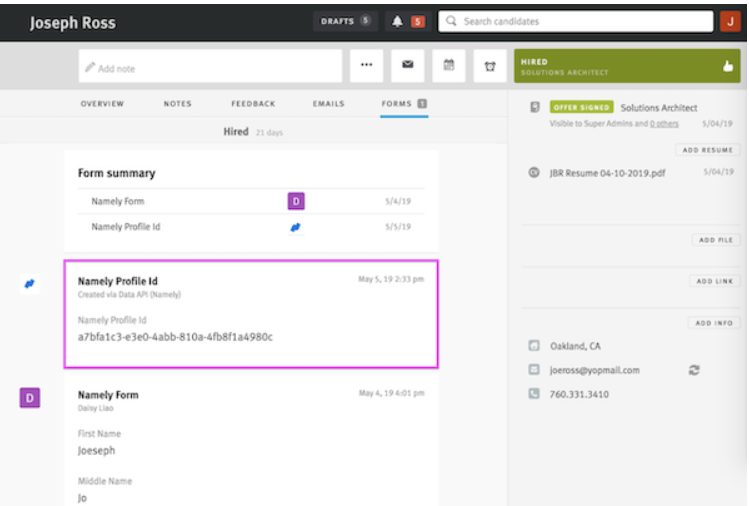
Once the record has been successfully created in Namely, a new story will appear on the candidate profile page in Lever with the Namely ID.