Setting Up Your Integration with Bonusly
How to set up your Namely/Bonusly integration.
Getting Started
Integrating Bonusly with Namely allows you to automatically manage Bonusly user accounts for your entire team.
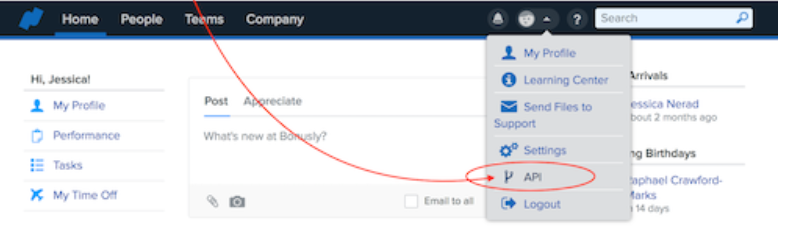
First, make sure that you are signed into both your Namely and Bonusly accounts. Then head over to the Namely account page here, click the drop-down profile button, and select API.
Once you click API, a window will open and where you can create a new Personal Access Token. Click the Personal Access Tokens tab and give the access token a recognizable name like "Bonusly." After you've named your token, click Create.
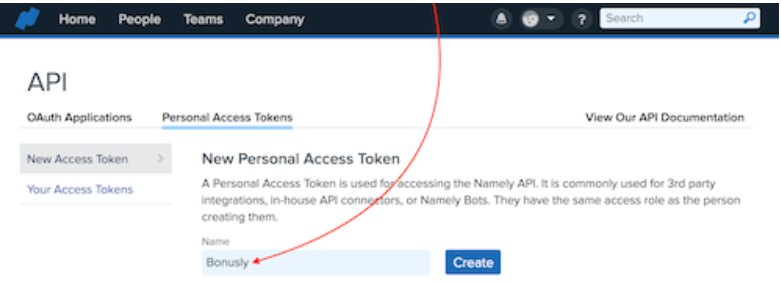
A unique Personal Access Token will populate for you. Copy the access token before you navigate away from this page because it will only appear once

If you can't copy the access token in time, you can create a new one by repeating the steps outlined above.
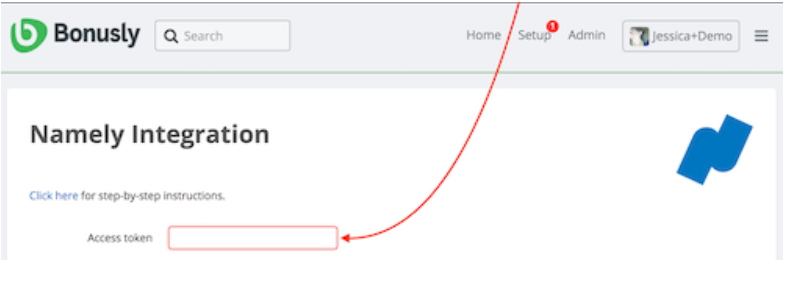
Once you've copied the access token, go to the Bonusly-Namely Integrations page and paste it into the Access token field.
Next, you will need to add your subdomain from the Namely account. This appears in the URL before Namely.com in your browser on the Namely page.
Highlight the words in front of the .namely.com/api/tokens from the browser and then paste it into the Subdomain field in Bonusly.
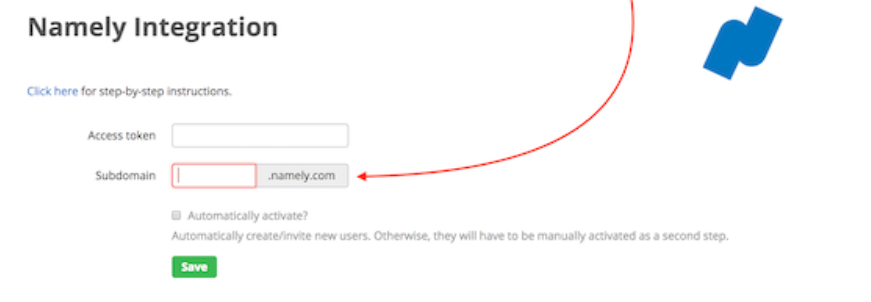
Once both of those fields are filled in, select the Automatically activate box. This will ensure that users added or removed from your Namely application will automatically update in Bonusly.
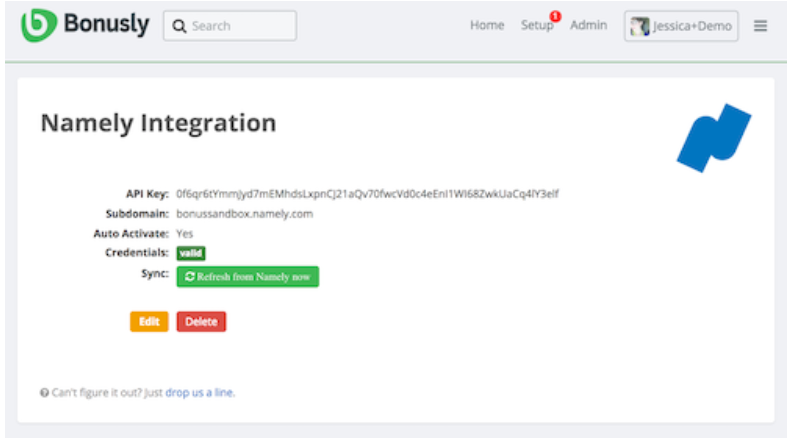
After you click Save, your Namely integration with Bonusly will be confirmed. Your screen should have the API Key and Subdomain fields completed with valid credentials and confirmed sync.
Still need help? Please reach out to support@bonus.ly (this is a Bonusly owned integration).