Document Management
This manual will help you understand how to manage documents to both the company level (via the Resources folder) and on the employee level (via the employee profile).
OVERVIEW
Documents can be saved on two levels in HRIS:
-
On the company level, where the documents are typically visible to everyone working at the company. These commonly include company announcements, benefits documentation, forms that need to be publicly available, etc.
-
On the employee level, where the documents are- depending on Roles and Permissions- typically only visible to the employee themselves and authorized admins.
Note: For instructions on how to mass import documents, refer to How do I mass import documents to employee profiles?
If you're looking for instructions on how to update your Adobe documents, read How can I update my Adobe forms?
MANAGING DOCUMENTS ON THE COMPANY LEVEL (RESOURCES FOLDER)
To add documents that are generally visible to everyone at the company:
-
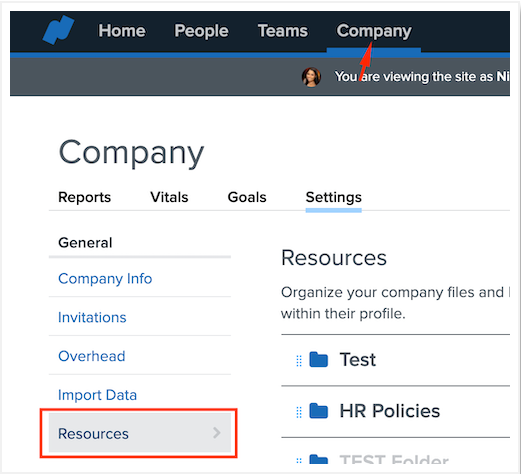
From the Namely homepage, navigate to Company > Resources.

-
If you scroll, you will find options for Add File, Add Link, and Add Folder. You can begin creating Resources folder content by clicking on any of these options.

To remove documents that are generally visible to everyone at the company:
-
From the Namely homepage, navigate to Company > Resources.
-
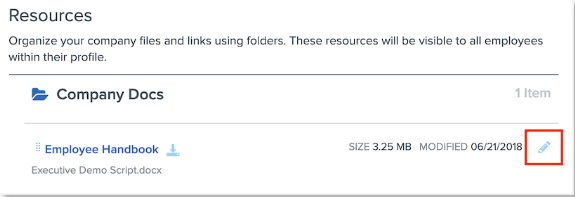
Click on the Pencil icon to edit the document you wish to delete.

-
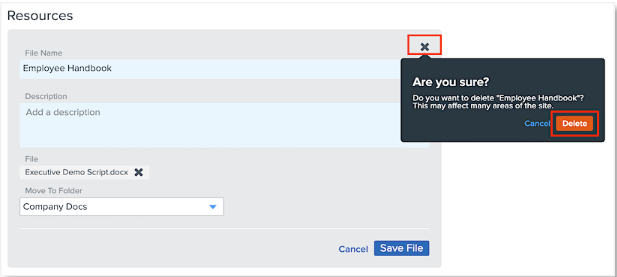
Click the X icon > Delete.

ADDING DOCUMENTS ON THE EMPLOYEE LEVEL
To add documents to a particular employee's profile:
-
Navigate to your Namely site.
-
Search for and select the employee you need to update.
-
You can either type the employee's name in the search field at the top, or click the People tab on the landing page to be presented with a sortable list of all your employees.
-
-
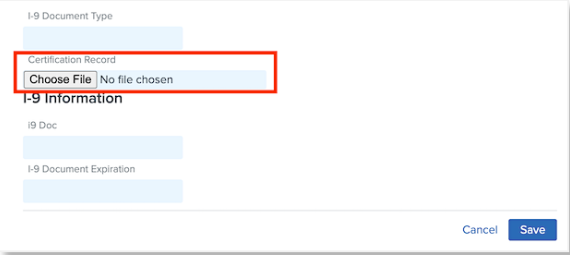
On the employee's profile, click the tab where the document will live and select the appropriate Add or Edit option to begin adding/updating.
-
Note: certain fields are pre-built by Namely (during implementation) to be able to hold documents- e.g., resume, offer letter. If you need a non-standard field to hold a document, you will need to configure a new custom field so that it can host a document. For information on configuring profile fields, please see: Configuring Profile Fields.
-

TIP:
There is no limit to the number of documents that may be loaded to the Resources folder, but the maximum file size that can be loaded to either the Resources folder or the employee profile is 20MB.