Termination and Rehire Process
We've released two new forms that provide unified, easy-to-use forms for terminating and rehiring employees in Namely.
Overview
The Termination and Rehire Forms are streamlined, easy-to-use forms that conveniently close relevant employment records (including payroll and benefits eligibility, if applicable) when a worker leaves your organization and re-open those records should the worker eventually return.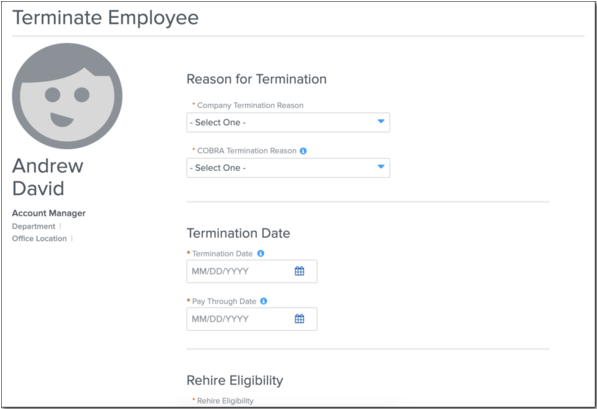
Once launched for an employee, the Termination Form automatically kicks off processes to close out any benefits, payroll, or demographic records that need to be accounted for when an employee is terminated.
To ensure all employment records are updated correctly should you need to make any changes to information entered on the termination form after it’s been submitted, you’ll need to cancel the termination and relaunch it. This will prevent manual changes to profile fields that could result in data discrepancies and errors if they conflict with the Termination Form.
Additionally, Departure Date is no longer editable on an employee's profile.
Roles and Permissions
The Termination Form can be accessed by any user who has the Can Terminate Profile permission.
The Can Terminate Profile permission can be scoped to apply only to certain employee populations (for example, you could scope the permission so a user can only terminate their direct reports or employees in their same department).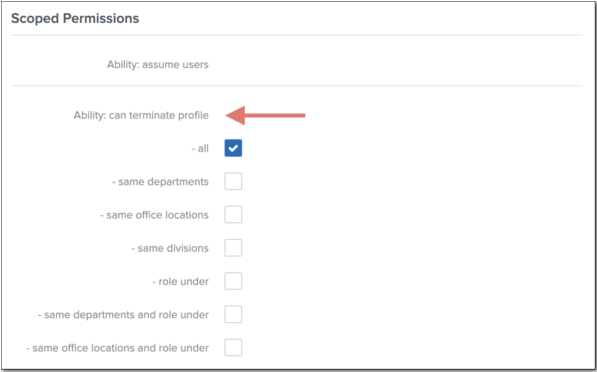
-
Note: A user does not need to have User: Edit permissions over any profile fields included in the Termination Form (for example, Departure Date or Termination Reason) to use it.
For more information on accessing and scoping user roles and permissions, see Scoped Permissions.
Using the Termination Form
Profile Changes
The Termination Form can be accessed via an employee’s HCM profile.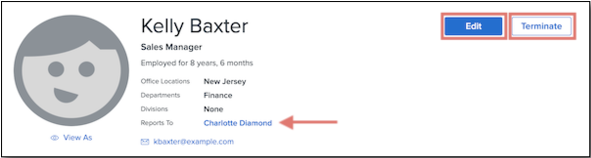
In addition to displaying the employee’s org unit assignments*, the header now includes who the employee reports to.
We’ve also replaced the three dot menu next to an employee’s name with Edit and Terminate buttons for editing the employee’s profile and launching the Termination Form, respectively.
*Please note: The profile header now only displays department/division/location for clients who have migrated to the Org Types and Org Units. In the event that you have not yet gone through Org Unit migration, these lines will be blank until your organization has been migrated.
Termination Form
Click Terminate at the top of an employee’s profile to access the Termination Form.
The fields that surface in Termination Form are dependent on the specific features you use in Namely (for example, Payroll or Benefits). If your organization does not use a particular Namely feature, fields related to that feature won’t display in the Termination Form.
Potential fields (by feature) in the Termination Form include:
All clients:
-
Company Termination Reason: These are the reasons your company has designated as possible causes for termination. They are configured under Company > Settings > Termination Reasons. For more information, see Employee Data Settings: Termination Reasons.
-
Termination Date: The employee’s last day of employment.
-
Rehire Eligibility: This is a new, required field that will be used in a future release improving the rehire process. You can select Eligible or Ineligible.
-
Rehire Eligibility Note: An optional field for adding notes on an employee’s rehire eligibility.
-
Deactivate Employee’s Namely Account: Removes access to the employee’s HCM account at 11:59 PM ET on their termination date.
Payroll clients:
-
Pay Through Date: The date after which the employee will no longer be included in pay cycles being processed. Must be greater than or equal to the Termination Date.
-
Give Terminated Employee Future Access to Pay Stubs and Tax Documents: Sends a link to the employee’s personal email address on their termination date providing access to past pay stubs and year-end tax documents.
-
Terminated Employee’s Personal Email: The terminated employee’s email address (used for emailing link to access past pay stubs and year-end tax documents).
Benefits clients:
-
COBRA Termination Reason: These are government-defined causes of termination required for COBRA benefit assistance.
-
Terminate Benefits: Checked by default, this field kicks off the benefits termination process. The date the employee loses coverage is determined by the rules set in the benefit plan settings.
Note for multi-EIN clients: Using the Termination Form will terminate an employee from all payroll subsidiaries at your organization. To remove an employee from a single subsidiary, you must add an end-date to their pay group assignment. For more information, see How do I remove an employee who is paid via multiple payroll subsidiaries (EINs) from just one of those subsidiaries?
For more information on using the Termination Form, view our Terminating an Employee in Namely Using the Termination Form guide.
Termination Form—What Happens After Submitting
Pending and New Changes Requests
After you have completed all necessary fields in the Termination Form and clicked Terminate, a modal will appear asking you to confirm the termination and informing you that all of the employee’s in-progress workflow instances (custom workflows) that include fields in the Termination Form will be canceled on their effective dates.
Note: Should you view a pending workflow instance impacted by the termination, a banner will display that the workflow instance was canceled due to a pending termination. Any canceled workflow instances will need to be deleted and resubmitted by the employee for approval.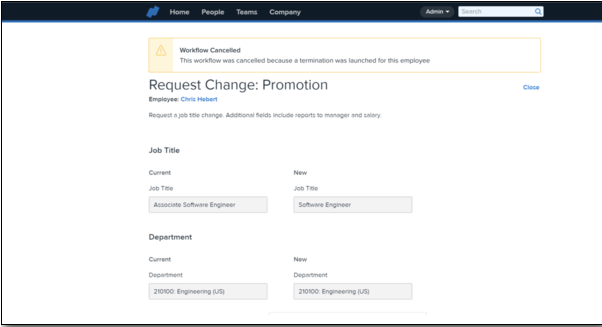
Additionally, after submitting the termination, no new workflow instances that contain fields included in the termination form can be launched for that employee. Any workflow instances linked on fields impacted by termination on the employee’s profile will be disabled.
Automated End Dating and Deletion of Employee Records
When an employee’s termination is submitted, a number of records are automatically end-dated or deleted on the termination date and pay through dates.
At 11:59 PM ET on the termination date:
-
The employee profile will be made inactive, and the employee will lose access to the system (if "Deactivate employee's Namely account" has been chosen on the Termination Form).
-
Note that access to Namely Payroll will be removed at 7:59 PM ET/11:59 PM UTC.
-
-
Any allocation records assigned to the employee that have a start date after the employee’s termination date will be automatically deleted.
At 11:59 PM UTC on the pay through date:
-
Any salary records (including wages and bonuses) will be automatically end-dated.
-
Any wage records assigned to the employee that have a start date after the employee’s termination date will be automatically deleted.
-
The Include in Payroll checkbox on the employee’s profile will automatically be deselected.
Note: If a pay through date is not designated (for example, because you do not use Namely for Payroll), the system will use the termination date for the above records.
Employee Status During Termination
Once an employee’s termination has been launched, a banner will display on their profile to any user who has the Can Terminate Profile permission. Depending on what features your company uses, the selections made in the Termination Form, and what dates in the form have already passed, the banner could potentially display:
-
The date on which the employee was/is scheduled for termination and when account was/will be deactivated
-
The date on which the employee was/will be removed from Payroll
-
The date on which the employee’s benefits termination was kicked off
-
Note: The exact date the employee loses coverage is dependent on the benefit plan’s eligibility settings.
-
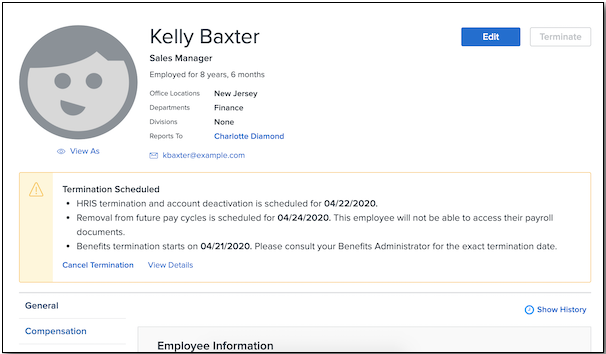
Termination status banners will also include links to cancel the termination and view details of the termination:
-
Clicking Cancel Termination opens a confirmation modal. Depending on what termination actions have already occurred, the modal will display any items that can’t be reversed. See How to Cancel a Termination for more information on canceling terminations.

-
Clicking View Details will load the Termination Form and display the details relating to the specific employee’s termination.
Editing Employee Data During In-Progress Terminations
Editing Fields in the Termination Form After Kickoff
To reduce the likelihood of errors or conflicting data that could result from a user making changes to information entered in the Termination Form, most fields on the termination form can’t be edited after the termination has been launched.
If you need to make changes to information entered (e.g., changing the Departure Date) in the Termination Form, you’ll need to cancel the termination and submit a new one with the correct information. See How to Cancel a Termination for more information on canceling terminations.
-
Note: Your ability to cancel specific termination actions depends on what dates have passed in the termination process. For more information about what termination actions can be canceled or reversed (and when).
The one field on the Termination Form that can be changed after kickoff is the Pay Through Date, which can be edited until the pay through date has passed. After that, you can no longer change any field on the termination form without canceling the termination.
-
Note: If you change the pay through date entered in the Termination Form, the end date for the Salary record will be automatically updated.
See below for a timeline:
|
If... |
Then... |
|
Today is after the termination kickoff date, but before or equal to the pay through date |
You can’t edit any field on the Termination Form except Pay Through Date. |
|
Today is after the pay through date |
You can’t edit any field on the Termination Form. |
Editing Fields on the Employee Profile After Termination Kickoff
Similarly, fields in the Termination Form can’t be edited via the employee profile once a termination has been launched. This includes:
-
Termination Date
-
Termination Reason
-
Department
-
Division
-
Office Location
-
Class
-
Salary
-
Bonus
-
Personal Email
-
Rehire Eligibility
-
Rehire Note
-
Include in Payroll
An exception to this list is User Status, which can be edited via the profile after launch, as it determines the employee’s ability to access Namely HCM and you may need to revoke the employee’s access prior to their termination date.
Once the termination date has passed, all fields on the employee profile will once again be editable. See below for a timeline:
|
If... |
Then.. |
|---|---|
|
Today is after the termination kickoff date, but before or equal to the Termination Date |
You can’t edit any fields on the employee profile related to termination except User Status. |
|
Today is after the Termination Date |
You can edit all fields on the employee profile. |
For more information on editing profile fields during an in-progress termination.
-
Note: If you need to add bonus or severance payments for an employee after a termination has been launched, please track these payments via custom fields in Namely and pay them out via additional payments in Payroll (before the pay through date has passed).
Canceling a Termination
Depending on the Namely features your company uses, there are potentially three windows dictating your ability to cancel or reverse actions in a termination.
In each instance, you can initiate the cancelation by clicking Cancel Termination on the banner that appears on the employee’s profile after the termination has been launched.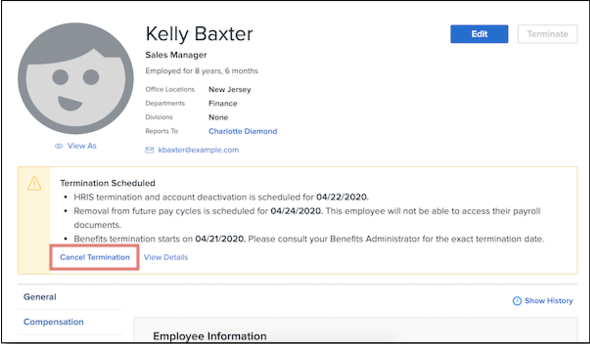
Window 1
From the moment the Termination Form is opened until 11:59 PM UTC on the date the Termination Form is launched
During Window 1, all actions in the Termination Form are reversible. Canceling the termination will clear all values entered into all fields.
Note: If the termination date or pay through dates entered are before the launch date, the employee will need to be rehired. For more information, see Rehires in Namely.
Window 2
From 11:59 PM UTC on the date the Termination Form is launched until 11:59 PM UTC on the termination date
During Window 2, all events that have occurred in Namely HR or Payroll can be reversed upon clicking Cancel Termination except benefits termination. The employee will need to re-enroll to continue receiving benefits.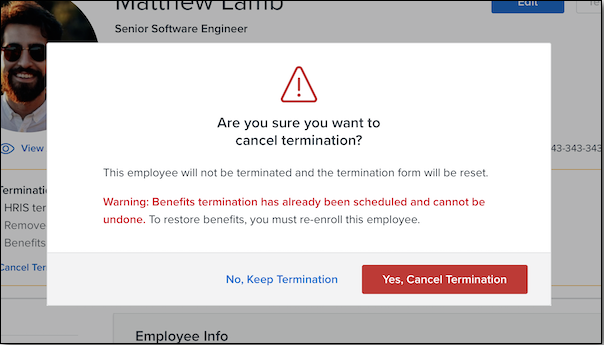
Window 3
After 11:59 PM UTC on the termination date / pay through date
After the termination date and/or pay through date has passed, the termination is final and nothing can be reversed. The Cancel Termination link will not display on the employee’s profile, and the employee will need to be rehired.
We’ve created a handy reference guide that covers the above timelines, what can and can’t be reversed, and when.
Rehiring Terminated Employees
Permissions
Any user with the Administer onboarding sessions permission enabled can rehire an eligible employee. Rehiring access assumes an access role already has Can Terminate Profile assigned.
Note: You will also want to make sure that the field-level permissions for the fields in the Rehire Form form are set to Read and Edit for the appropriate roles at your organization. Please see Field Group Bundle Permissions for more information on updating these field-level permissions.
-
The fields on the form for which you may need to update these permissions are: Start Date, Access Role, First Name, Middle Name, Last Name, Personal Email, Company Email, Home Address, Job Title, Salary, Manager, Include in Payroll, Pay Group, and Subsidiary.
How to Rehire a Terminated Employee
If you need to rehire a terminated employee:
-
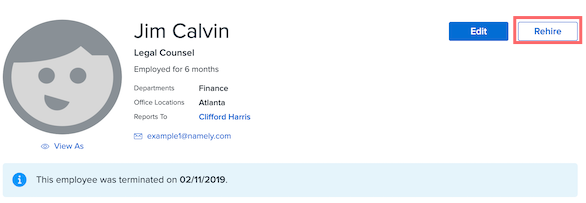
On the employee’s profile, click Rehire.
-
Note: The Rehire button will only display if the employee has been assigned a termination date which is less than or equal to the current date.
-
-
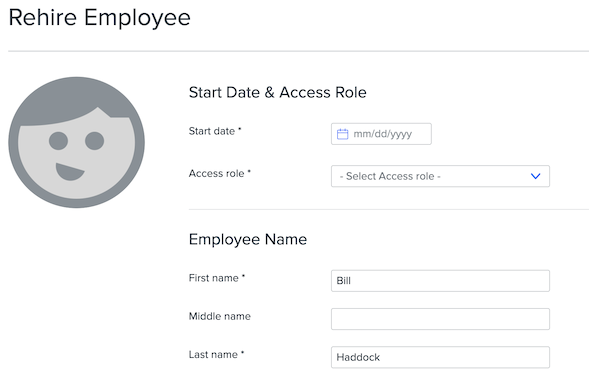
Enter a new Start Date, Access Role, First Name, Middle Name, Last Name, Personal Email, Company Email, Home Address, Job Title, Salary, Payroll Company, and Manager for the employee.
-
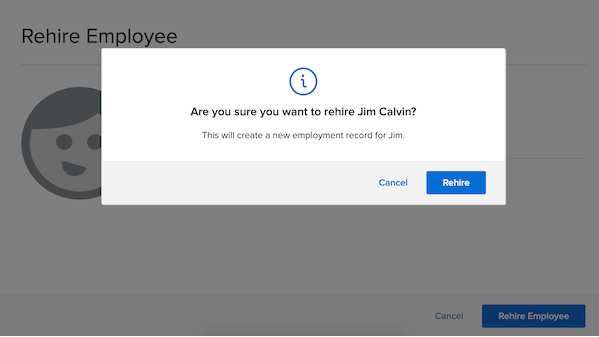
Confirm that you want to rehire the employee by clicking Rehire.
-
Note: when you click Rehire, the employee's Start Date will become their new Start Date; please be sure to make a note of the original Start Date before clicking Rehire, if you need this information for your records. Please see Rehires in Namely (for Clients with Rehire Button) for more information on saving this historical data in the Namely system.
-
What Happens After Rehiring
After clicking the Rehire button, the following fields on the employee’s profile will be immediately reset:
-
Departure Date
-
Termination Reason
Please note once more that the employee's Start Date will now be the new Start Date, and the original Start Date will no longer appear on the employee's profile.
Note: The rehired employee’s user status will become active on the new Start Date.
Additionally, a banner will display on the profile of any rehired employees with a future start date, letting you know their rehire status is pending.
Updating Required Profile Fields
After submitting the rehire, you’ll need to update any employee profile fields that not in the rehire form that were end-dated when the employee was terminated.
If you use Namely for Payroll, you can easily see which fields need to be updated:
-
Select the Include in Payroll checkbox in the Current Payroll Information section of the employee’s General profile tab.
-
Click Profile Status in the Admin Tools section of the Namely homepage to see and complete any required profile fields for the employee.
Additional Notes
-
Important: To support successful rehires, an employee’s most recent hire date should always be entered as their official Start Date in Namely.
-
Multi-EIN clients: The Payroll Subsidiary field can no longer be edited on an employee’s profile. If you need to change an employee’s payroll subsidiary, you can Remove it and create a new record.
-
To prevent workflow instances from conflicting with the Termination Form, Termination Date will no longer be an allowed field in any workflow instances. Any workflow instance templates that include Departure Date will be automatically updated to remove that field. If Departure Date is the primary field in the workflow instance, we will reach out to you with next steps.