IRS Contribution Limits Update
The IRS has announced new annual commuter and FSA benefit contribution maximums for the 2024 calendar year. Read below to find out how to apply the new maximums to your Open Enrollment.
OVERVIEW
The IRS has announced new annual commuter and FSA benefit contribution maximums for the 2024 calendar year. You can review the new limits below and on the IRS website.
-
The monthly limitation for the qualified transportation fringe benefit and the monthly limitation for qualified parking has increased to $315.
-
The dollar limitation for employee salary reductions for contributions to health flexible spending arrangements has increased to $3,200. For cafeteria plans that permit the carryover of unused amounts, the maximum carryover amount is $640, an increase of $30 from taxable years beginning in 2023.
Implementing New Contribution Limits
Namely’s system was updated to reflect the new limits, but you may need to take action based on the status of your Open Enrollment. Below is a detailed list of the scenarios that may occur and any action that will need to be taken.
Open Enrollment Has Not Started
If your Open Enrollment has not started, no action needs to be taken. The new IRS maximums will be reflected for all future enrollments in the 2024 calendar year.
Open Enrollment Is in Progress
Employees who are interested in taking advantage of the new IRS maximums who have started, but not yet submitted, their Open Enrollment, should follow the steps below:
-
Exit the current enrollment session.
-
Relaunch Open Enrollment
-
Select Clear my benefits and let me start again.
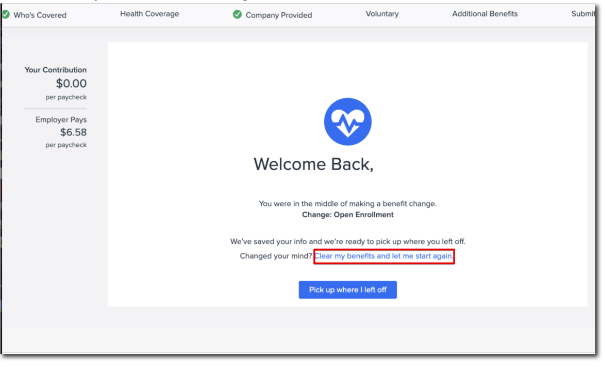
When the session is relaunched, they’ll be prompted to reselect their benefits, which will now reflect the new IRS maximums.
Open Enrollment in Progress With Submissions
If your Open Enrollment has been kicked off, and you have employees who submitted their elections and would like to apply the new maximums, you’ll need to reject the submission and have them resubmit their election.
To reject their submission:
-
Go to Manage Benefits > Open Enrollment > Dashboard > Employee Enrollments.
-
Click the three dots next to an employee’s enrollment to manage that individual enrollment.
-
Click Reject to reject a submitted enrollment.
-
Rejected enrollments will return to the In Progress status, and the Details column will include a note with the date the enrollment was rejected. Hover over the info icon to see who rejected the enrollment and at what time. The employee will have the option to edit their enrollment or restart it from scratch. Once the enrollment has been resubmitted, any notes in the details column about the rejection will be removed.
-
Open Enrollment Has Ended
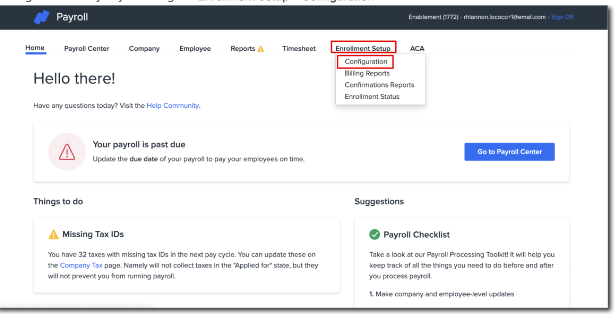
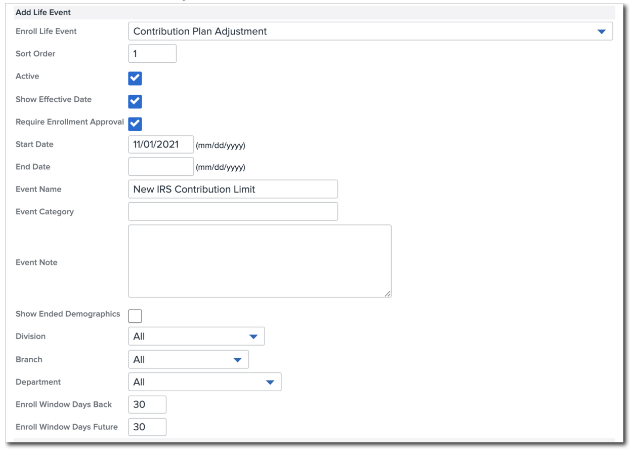
If your Open Enrollment has ended and you have employees who would like to apply the new maximums, you must add the Contribution Plan Adjustment life event to your site. To add a life event:
-
Log in to Namely Payroll and go to Enrollment Setup > Configuration.
-
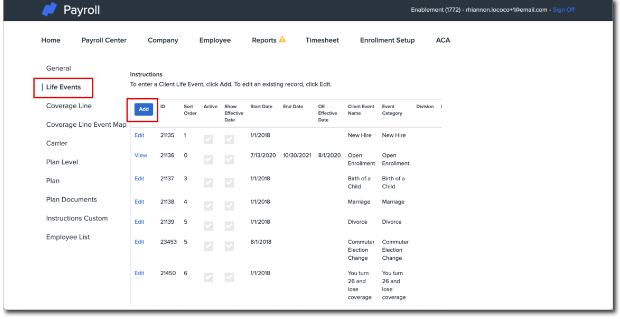
Go to Life Events > Add.
-
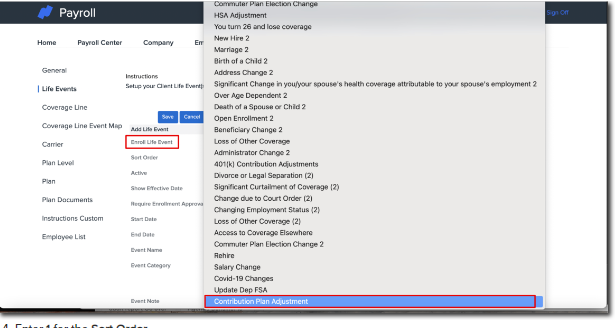
Select Contribution Plan Adjustment in Enroll Life Event.
-
Enter 1 for the Sort Order.
-
Check the box for Active, Show Effective Date, and Requires Admin Approval.
-
Enter the desired Start Date.
-
UseNew IRS Contribution Limit as the Event Name.
-
Enter 30 for Enroll Window Days Back.
-
Enter 30 for Enroll Window Days Future.
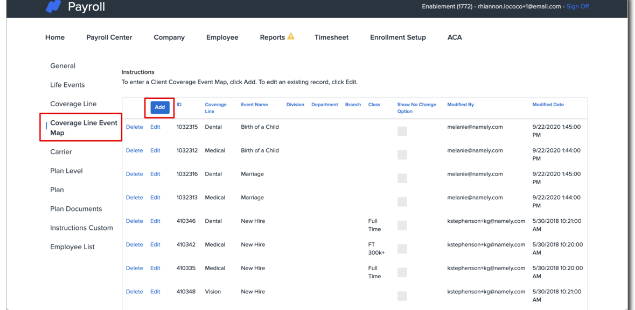
After you have successfully added the life event, you can map the event to your coverage lines. To do this:
-
Go to Coverage Line Event Map > Add.
-
Select the applicable Client Coverage Line.
-
Medical Reimbursement
-
Commuter
-
Parking
-
-
Select Contribution Plan Adjustment.
-
Click Save.
If multiple coverage lines are impacted, repeat the steps above for each. Each coverage line needs to be mapped individually to the event.
Once the life event has been added and the coverage line has been mapped successfully, the employee can enroll in the benefit. Employees who want to enroll can follow the steps below:
-
Go to Enroll in Benefits.
-
Select I need to change a specific benefit > Continue.
-
Select IRS Contribution Change > Continue.
-
Select the date 1/1/24.
-
This date is required and should be confirmed before approving any employee elections. Any date prior or after 1/1/23 will result in a failed enrollment.
-
-
Go to the appropriate benefit and update the contribution to the new desired amount.
-
Click Save & Continue.
-
Agree to the terms and conditions then click Submit Enrollment.