How to Create Plans and Rates
How to create a plan and add plan rates.
Details
The instructions provided in this article only applies to certain plans. Please refer to the below for more information regarding the different Plan Setups:
Creating a New Plan
Namely creates your organization's plans during implementation. To access your plans, go to your benefits site in Payroll and click Plan in the left column.
To add a new plan:
-
Click Add Plan.
-
Enter the Plan Name.
-
Enter the Enroll Plan Name to display to your employees.
-
Note: The Enroll Plan Name typically matches what was entered as the Plan Name.
-
-
Enter the plan’s Start Date.

-
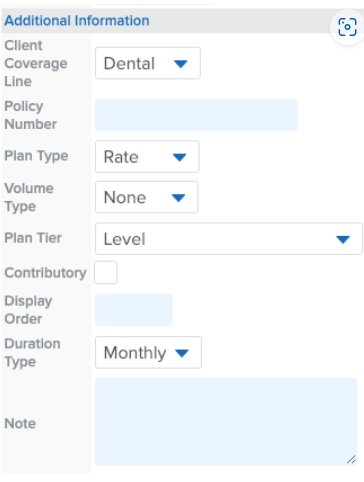
Select the Client Coverage Line from the dropdown menu.
-
Enter the Policy Number (optional).
-
Enter the Plan Type: Rate or Volume.*
-
Enter the Volume Type (if applicable).*
-
Enter the Plan Tier.*
-
*Note: The Plan Type, Volume Type, and Plan Tier should match exactly what was entered under Coverage Line.
-
-
Select whether the plan is Contributory (whether the employee contributes).
-
Enter the Display Order (for multiple plans in a coverage line).
-
Select Monthly for the Duration Type.
-
Enter any desired Notes.
-
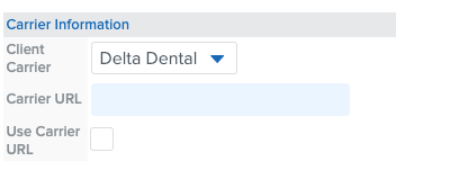
Select a Client Carrier from the dropdown menu.
-
Enter the Carrier URL.
-
Select whether to use the Carrier URL.
-
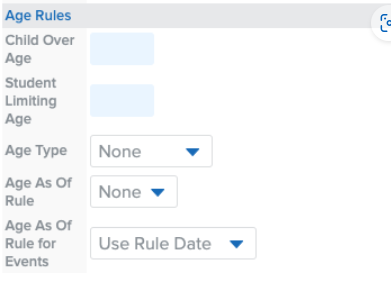
Enter a Child Over Age (age at which point a child dependent is no longer eligible).
-
Enter a Student Limiting Age (age at which point a student dependent is no longer eligible)
-
Complete additional eligibility rules
-
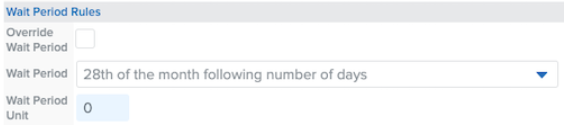
Selectwhether you want to Override Wait Periods.
-
Use the Wait Period dropdown to select when benefits should kick in.
-
Enter the number of Wait Period Units when appropriate.
-
Note: Override Waiting Period should only be selected if it differs from the waiting period set up at the class level.
-
Select a Termination Period for benefits.
-
Enter the number of Termination Period Units when appropriate.

-
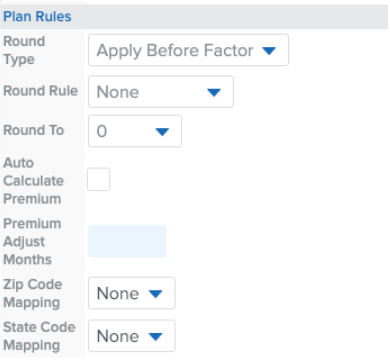
Complete any rounding rules or zip code mapping, including:
-
Select Auto Calculate Premium.
-
Enter 2 as a default value under Premium Adjust Months.
Note: This value may differ depending on the carrier.
-
Click Save.
Adding Plan Rates
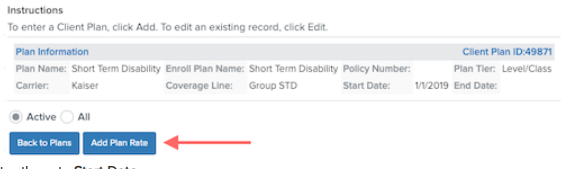
Once you’ve created a plan, you’ll need to add its rates. Namely will create your initial plan rates during implementation, but administrators can update them annually when they need to be changed.
Note: Depending on the type of plan, rate schedules and other setup requirements will differ.
To update your plan’s rates:
-
Select Edit Rate next to the desired plan.
-
To add a plan rate, select Add Plan Rate.

-
To edit a plan rate, select Edit Plan Rate.
-
Enter the rate Start Date.
-
Select the Plan Level.
-
Enter the total monthly Rate.
-
Enter the Monthly Employee Contribution.
-
Select the Pay Period.
-
Note: Be sure to consider whether your pay is processed on a semi-monthly or bi-weekly basis.
-
-
Enter the employee Pay Period Amount.
-
Click Save.