Creating and Mapping Coverage Lines
Creating coverage lines in Namely Payroll and mapping them to life events.
Need some extra help with your benefits configuration? Namely offers a wide range of additional services that allow our clients to focus on what matters most—building a better workplace. Check out our Project Services Catalog and see how we can tackle the complex tasks for you.
CREATING COVERAGE LINES
Coverage lines establish the types of coverage your organization offers. Namely creates your organization's coverage lines during implementation, but you can update them if you need to.
You can access the coverage lines by going into Namely Payroll, clicking Enrollment Setup, and looking at the menu on the left hand side.
To Create or Edit a Coverage Line:
-
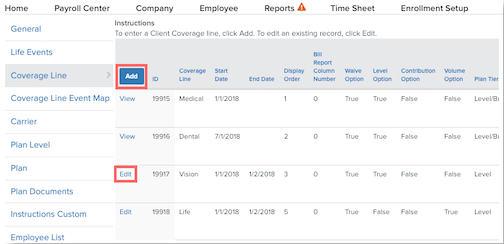
Click Coverage Line.
-
To make adjustments to existing coverage lines, click Edit.
-
To create a new coverage line, click Add.
-
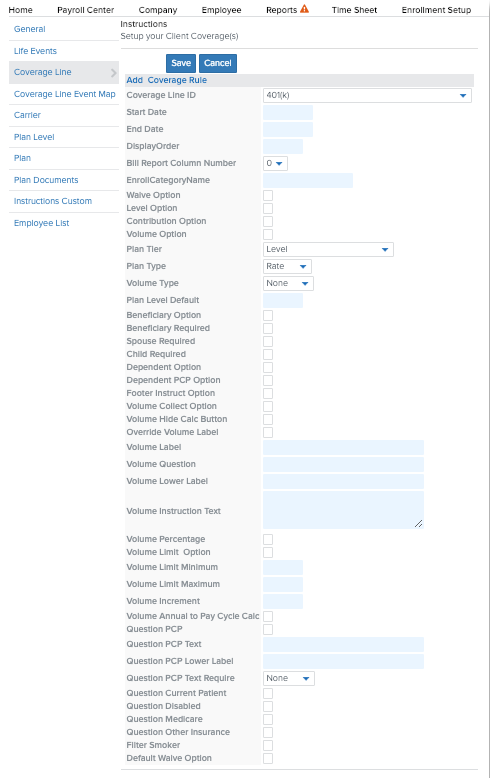
Select the Coverage Line ID from the dropdown menu.
-
Enter the Start Date.
-
Enter 1 for the Display Order.
-
Note: While a value must be entered in the Display Order field, it does not correspond to the final order in which coverage lines will be displayed.
-
Enter the Enroll Category Name.
-
Note: The Enroll Category Name should typically match the type of coverage selected in the Coverage Line ID dropdown.
-
Use the appropriate check boxes and dropdown menus to configure your plan details. Note: Not all details will be relevant to all coverage lines. Depending on your coverage line, you may need to configure options regarding:
-
Waiving coverage
-
Beneficiaries
-
Dependents
-
Primary care physician options
-
Whether the Plan Type is Rate or Volume
-
If the Plan Type is Volume, whether the type is Posted or Salary
-
Note: Volume-based plans are typically based on Salary for basic plans and Posted for voluntary plans.
-
-
Volume Minimums, Maximums, and Increments
-
Note: If you select Posted under Volume Type, the increment is whatever multiple by which you want employees to be able to contribute.
-
-
Default waive option
-
Click Save.
MAPPING COVERAGE LINES TO LIFE EVENTS
Coverage line maps connect a coverage line to a specific life event, allowing employees to make updates to their coverage when they experience that life event. Namely creates your organization's coverage line maps during implementation, but you can update them if you need to.
To Map a Coverage Line to a Life Event:
-
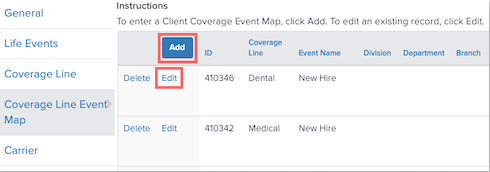
Click Coverage Line Event Map.
-
To make adjustments to existing coverage lines, click Edit.
-
To create a new coverage line, click Add.
-
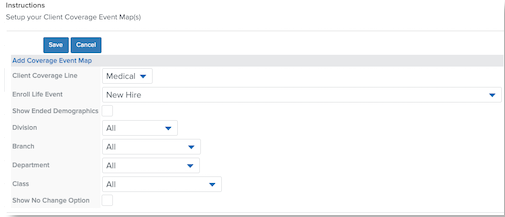
Select the Client Coverage Line from the dropdown menu.
-
Select the Enroll Life Event type from the dropdown menu.
-
Limit who is eligible for the life event using the Division, Branch, and Department dropdown menus.
-
Click Save.
BENEFIT MAPPING FOR OPEN ENROLLMENT
-
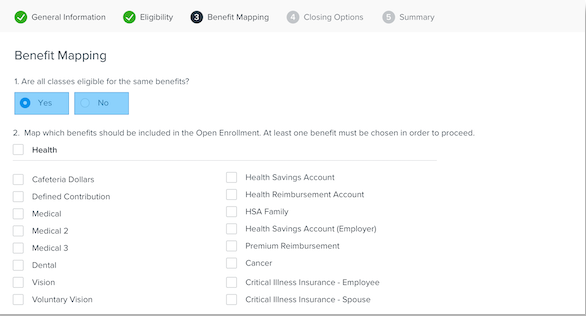
Select whether all classes are eligible for the same benefits.
If you select Yes:
-
Map which benefits should be included in the Open Enrollment. You must select at least one benefit to continue.
-
Benefit coverage lines are grouped by coverage line categories as they appear in the Enrollment Wizard (health, company-provided, etc.). Category names are defined by the benefit administrator when configuring their coverage lines.
-
Only coverage lines that are active on the Open Enrollment’s effective date will display. Should you change the Open Enrollment effective date, the coverage lines available to be mapped may change as well.
-
If you select the checkbox next to a coverage category, all coverage types in that category will be mapped.
-
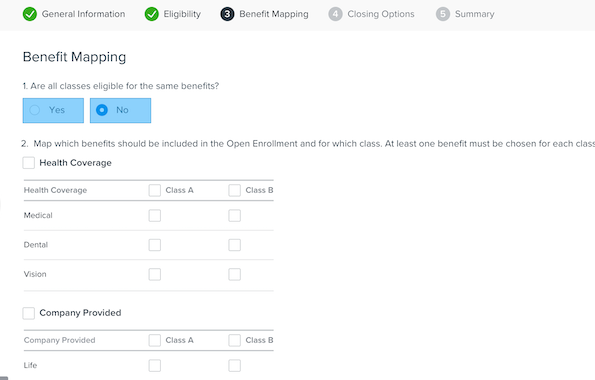
If you select No:
-
Map which benefits should be included in the Open Enrollment and for what class(es). You must select one coverage line per class.
-
If you add a new class in Company > Settings after completing this page, you’ll need to return to it and assign coverage to the new class.
-
Note for Multi-EIN Companies
If your company has multiple payroll entities, you will have to complete the mapping for each EIN.

Summary
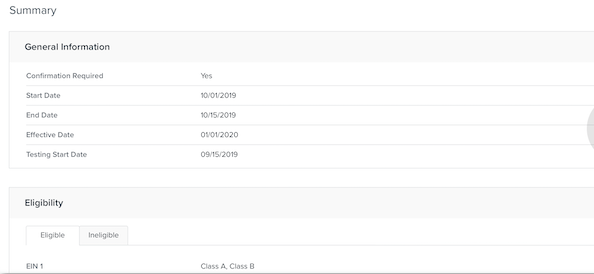
On the Summary page, you can review everything you entered in the previous steps. Once you have confirmed everything is correct, click Finish to activate the Open Enrollment.
-
Once you activate the Open Enrollment, all of the OE information will be viewable, but not editable, in Payroll.