Onboarding User Guide
OVERVIEW
This purpose of this document is to provide guidance on using your Onboarding Site.
The first step in the process to start any of the following is for you to log in to the website (https://onboarding.certipay.com), select your
company from the drop down and click Enter.
ADDING A DIVISION
This action can be accessed in a few areas:
-
Using the main navigation icons found at the top of the page, click on
 and select Add New Division.
-
Using the main navigation icons found at the top of the page, click on
and select Manage Divisions and then click on Create a New Division. -
From the Home page, click on Create New Division under Divisions
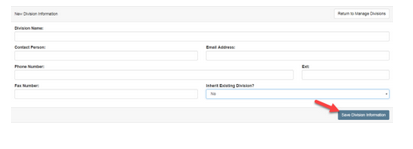
Populate information in all of the following fields. Click on Save Division Information when you are ready to add new Division.
If all of the same forms and contact information from another division apply to New Division, you can select Yes under Inherit Existing Divisions and then select which Division to Inherit
MANAGING FORMS IN A DIVISION
IF YOU NEED TO ADD A NEW, REVISE OR COMPLETELY REMOVE A FORM, PLEASE CONTACT PRODUCTS AT products@certipay.com.
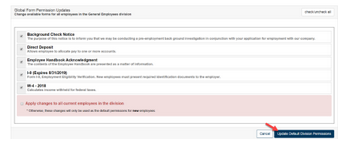
From the Division home page, under Global Form Permissions Update, select/de-select from the Onboarding forms available for all employees. After you have applied changes, click on Update Default Division Permissions.
PRE-POPULATING A FORM
This action can be accessed in a few areas:
-
Using the main navigation icons found at the top of the page, click on
 and select Pre-Populate Forms.
 -
From the Home page, under Admin Navigation, click the Select an Option dropdown and select Prepopulate a Form, click on Go!
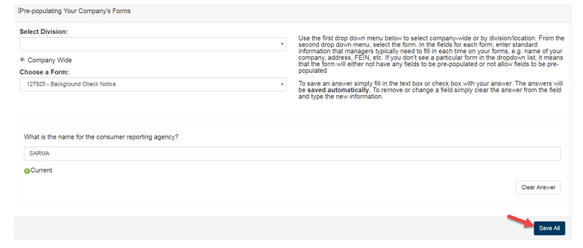
Click the drop down under Select Division and select your Division. If the prepopulated information is going to be the same for ALL Division, skip Select Division and click on radio button Company Wide.
Click the dropdown under Choose a Form and select the form to populate information. After populating information click on Save All. To edit, just type over. If you need to remove your pre-filled responses, click on Clear Answer.
ENFORCING DUE DATE ON A FORM
Using the main navigation icons found at the top of the page, click on and select Form Manager. Find the form you want to enforce a due date and click on  found under Due Date Enforcement.
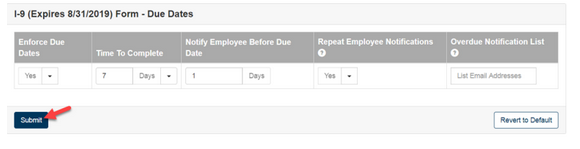
Click the drop down under Enforce Due Date and select YES. Apply a time to complete, select by Days/Weeks, Apply number of days when to start notifying Employee before Due Date, select YES/NO to Notify Employee every day until due date, enter in email address(s) of Admin/Staff user whom should receive notification if employee still has not submitted form by due date. If more than one email address is entered, separate by comma. Click on Submit to apply rule.
ADDING A NEW HR USER
This action can be accessed in a few areas:
-
Using the main navigation icons found at the top of the page, click on and select Add User.
-
From the Home page, depending on the user role, click on Create New HR Admin under HR Administrators or Create New HR Staff under HR Staff.
-
From the Divisions page, within the Division Navigation area, click on Add New HR Staff found under HR Staff.
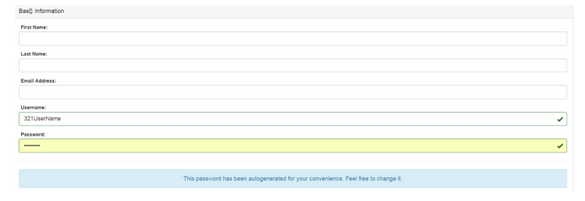
Populate information in all of the following fields.
Username: If you do not want the system to generate a random username, you can create your own. It is suggested to use email address
Password: Leave as is allowing the system to generate a random password. User has the option to change once they activate their account
-
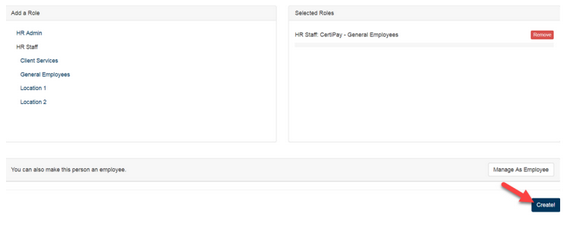
If adding from the Divisions Page, user will default under Selected Roles as HR Staff. If user needs to have full administrative rights, click on HR Admin to add under Selected Roles.
-
If user role is only HR Staff but will manage more than one Division, under Add a Role, click on HR Staff to view other Divisions. Click on Division to add under Selected Roles.
Click on Create! when you are ready to add new user.
ASSIGNING A FORM TO A USER
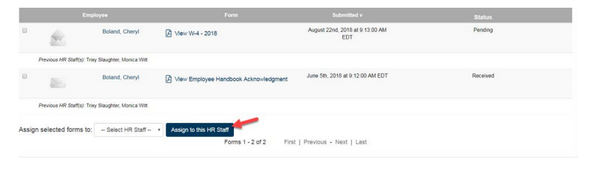
From the Divisions page, under Divisions Navigation/Division Stats, click on Unassigned Forms.
Click on Employee Name to manage forms. Select the form(s) you want to assign to another User. Click on the dropdown box next to Assign selected forms to: and select the HR Staff user. Click on Assign to this HR Staff when you are ready to assign the form(s).
MANAGING ASSIGNED FORMS
From the Divisions page, under Divisions Navigation, click on View My Forms.
Click on Employee Name/ Folder to manage forms. Click on Employee name again to go to Manage Form page.
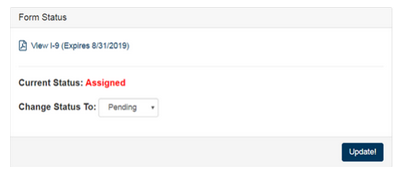
In the Manage Form page you will be given the option to view, print, or save the actual document by clicking on the  icon next to View XXXX form.
Click the drop down next to Change Status To: to change status to Pending, Approved, or Rejected.
ADDING A NEW EMPLOYEE
From the Division page, within the Division Navigation area, click on Add New Employee under Employees. Populate information in the required* and optional fields.
Email Address: If one is populated, this will send Employee email to activate their account and view Onboarding Documents.

User Name: If you do not want the system to generate a random username you can create your own. It is suggested to use Employee email address
Password: Leave as is allowing the system to generate a random password. Employee has the option to change once they activate their account
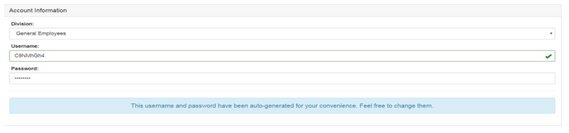
Company Code: This will ALWAYS default to your company code. Do not change or delete.

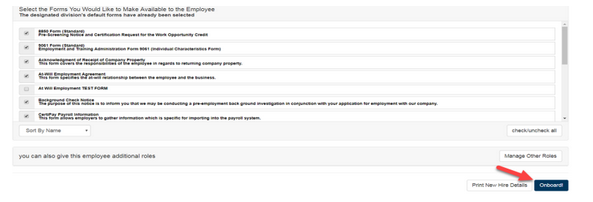
Division’s designated default forms will already be selected. You have the option to Select or De-select any form you want Employee to receive/not receive. Click on Onboard! when you are ready to create/send Activation Email.
EDITING EMPLOYEE PROFILE
-
This action can be accessed in a few areas:
Using the main navigation icons found at the top of the page, click on and type in the Employees First Name and/ or Last Name. Click to perform search. From the System Search page, click on Employee Name to access their Folder. Under Employee Information click the drop down next to Select an Action to Take and select Edit “Employee Name” Account.
 -
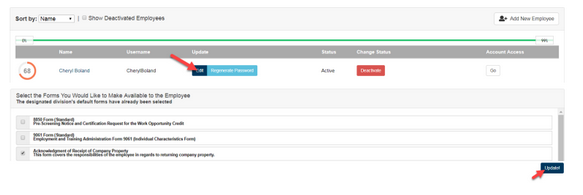
From the Divisions page, within the Division Navigation area, click on View Current Employee found under Employees to take you to the list of Employees of the Division. Once you have found your Employee from the list, Click on Edit.
On the Edit Employee Account page, you can edit Basic Information such as email address, move Employee to another Division, add/remove a form and manage their role. Click Update! when you are ready to apply changes.
RESEND ACCOUNT ACTIVATION EMAIL
This action can be accessed in a few areas:
-
Using the main navigation icons found at the top of the page, click on and type in the Employees First Name and Last Name. Click to perform search. From the System Search page, click on Employee Name to access their Folder. Under Employee
Information click the drop down next to Select an Action to Take and select Edit “Employee Name” Account. -
From the Divisions page, within the Division Navigation area, click on View Current Employee found under Employees to take you
to the list of Employees of the Division. Once you have found your Employee from the list, Click on Edit.
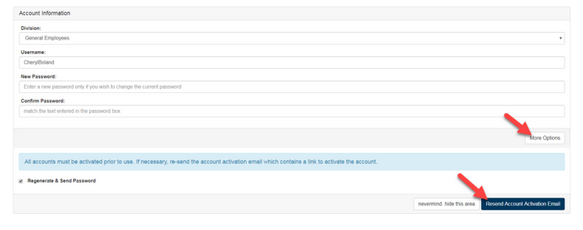
From the Edit Employee Account page, scroll down to the Account Information area and click on More Options and then click on Resend Account Activation Email
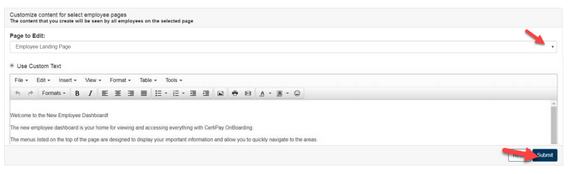
CUSTOMIZE CONTENT
Using the main navigational icons found at the top of the page, click on  and select Customized Content.
Select the Page you would like to edit by selecting from the Page to Edit drop down. Select the remote button next to Use Custom Text. After changes have been made click on Submit to save changes.
TASK MANAGER
Once you have opened the Task Manager, you will see several different options compacted on the left side.
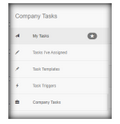
Each choice offers the User a way to Set, Schedule, Assign & Remind assignees of your choice regarding Task’s that need to be completed. You must first create a Task, connect this Task to a Trigger and then assign a user to this Task, which you can specify to your needs. Your assignee will also be notified with an email when they have a reminder, or a task trigger has activated the task they need to complete. To the top-right of the screen is a +TASK which can be clicked on at any time to create a new Task Template that you will assign a Task Trigger to
Clicking on the +Template will allow you to create a new Task Template.
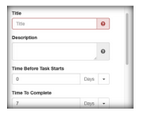
The Title is what your assignee will know the Task to be, for example “I-9 Form Completion”. The Description is to provide more specific details as to why this Task was triggered, for example, ‘An Employee has submitted their I-9 form & it needs approval”. The Time Before Task Starts and Time To Complete can be set in a timeframe of Days/Weeks. This can be set so the assignee knows how long they have to complete the task once the setting
for the task starting has been reached. They will also receive reminders that the task has not been completed (similar to a Form Due Date Enforcement, but more specified to a person or task instead of a form.)
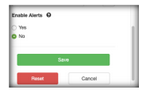
Enable Alerts is a setting that will inform the assignee they have been assigned this task as well as any other notifications pertinent to the Task (such as the amount of time before it needs to be resolved etc.) Then, Save your Task and pull up the Task Triggers.
HIRING AN EMPLOYEE FROM ONBOARDING
-
Log in to CertiPay
-
Choose Control
-
Click on Human Resources Tab
-
Click Applicant Tracking button
-
Click “View All Applicants”
-
Choose Employee
-
Click Hire
-
Populate any other needed fields in the wizard
-
Click Finish
-
Go to Employee Profile
Add any additional items needed (earnings/deductions, etc.)