Processing Manual CPO ACH Batches
Our ACH module is built within CertiPay Online. Manual files can be used to debit or credit the client's or employee's bank accounts.
Reasons to create and send batches:
-
Direct Deposit Returns
-
Payroll Redrafts for a NSF
-
Reversals
-
Tax Amounts (i.e tax variances, amendments or terminations)
How to create an ACH Batch:
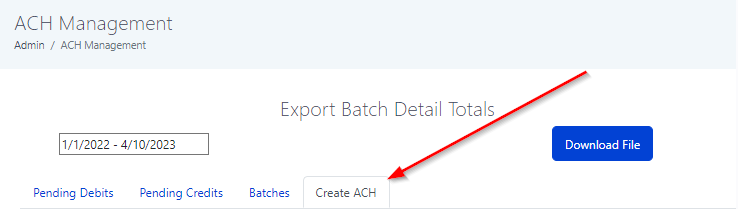
1. From the Admin Dashboard, select ACH under the Funding category.

2. Click the Create ACH batch tab.
3. Enter the Batch Description and Notes - See the below for notes on these sections.
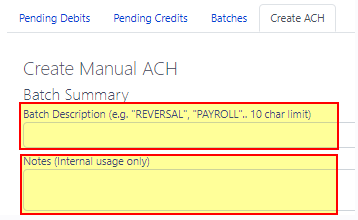
Batch descriptions are important for when the batch is sent to the bank. One of the below will need to be entered in this section:
-Payroll Debit
-Payroll Credit
-Tax Credit
-Tax Debit
-Reversal (Note, when processing a reversal, "Reversal;" will need to be added to the notes section.
In the notes section, enter a short reason of the batch and the reference ticket number. For example, DD Return - Reference Ticket #123456
4. Next select the company that the credit/debit is needed for and click the blue Load Company Distribution button
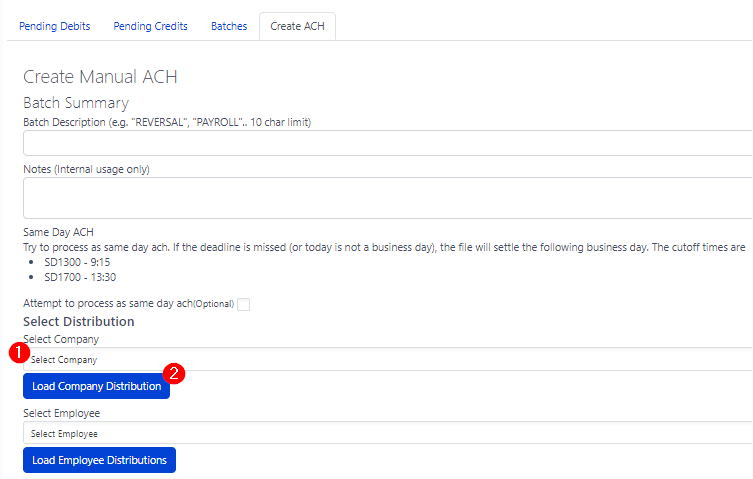
OR
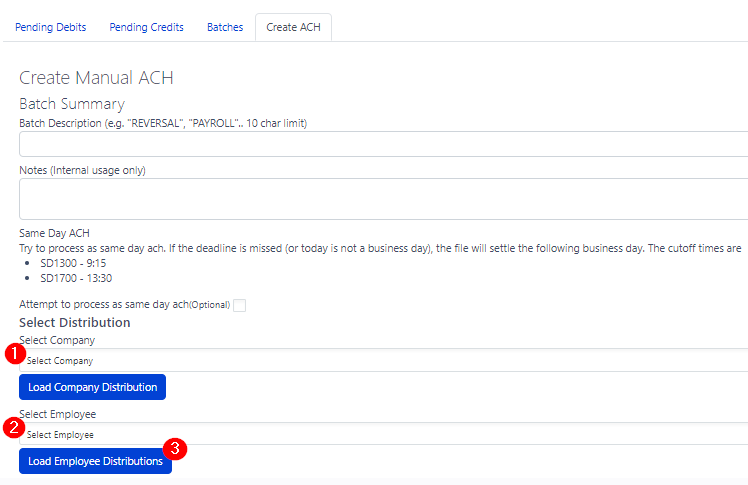
if you need to send a credit/debit to the employee's bank account, you will need to search the company and select the employee's name. Then click Load Employee Distributions
5. The Company/Employee information will populate below. Enter the dollar amount for the batch. Then click the blue + sign to add the entry to the batch.
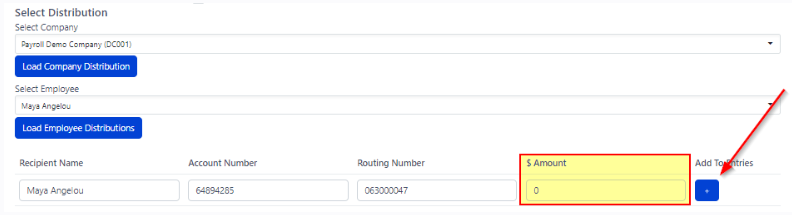
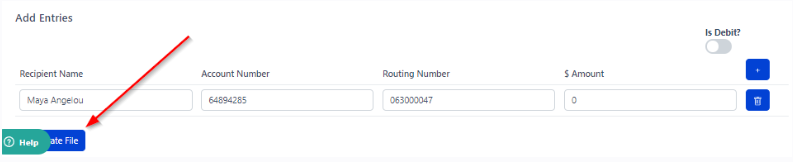
6. If the batch needs to be sent as a debit, the debit toggle will need to be marked.

If the batch needs to be sent as a credit, you will not need to mark anything within the batch.
7. Click Generate File
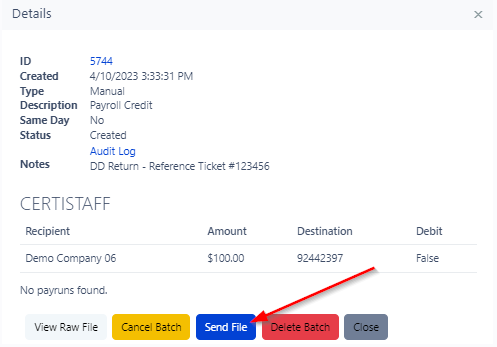
8. The batch detail review will pop up, this will be a good time to review the batch prior to sending. Once it is ready to send, the blue Send File button can be clicked.
Confirmation to the Support team that the batch was sent and batch ID to the ticket.
Example:
File was sent
Batch #5744